3DT Hay Roof Generator – Blender Geometry Node Procedural
3DT Hay Roof Generator – Blender Geometry Node Procedural
🎥 Demo Video
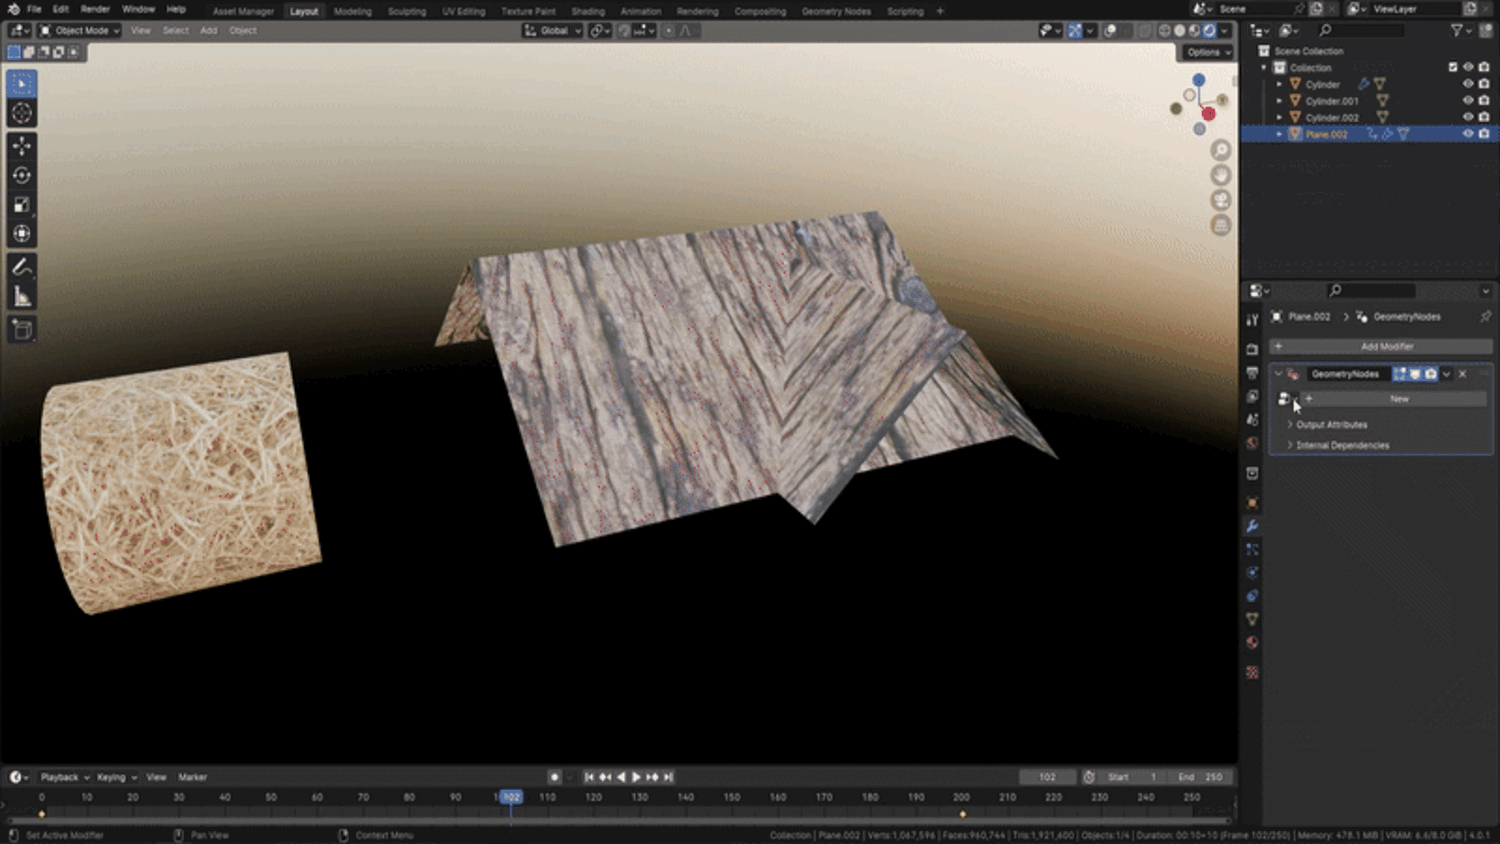
Create detailed, dynamic hay and thatch surfaces instantly with the 3DT Hay Roof Generator — a fast and flexible setup for Blender 4.0+.
Whether you’re building medieval huts, Viking halls, or countryside scenes, this tool allows you to add thick hay, editable in real time with full control over gravity, randomness, thickness, draw mode, and more — no simulation or particles required.
🎯 Key Features

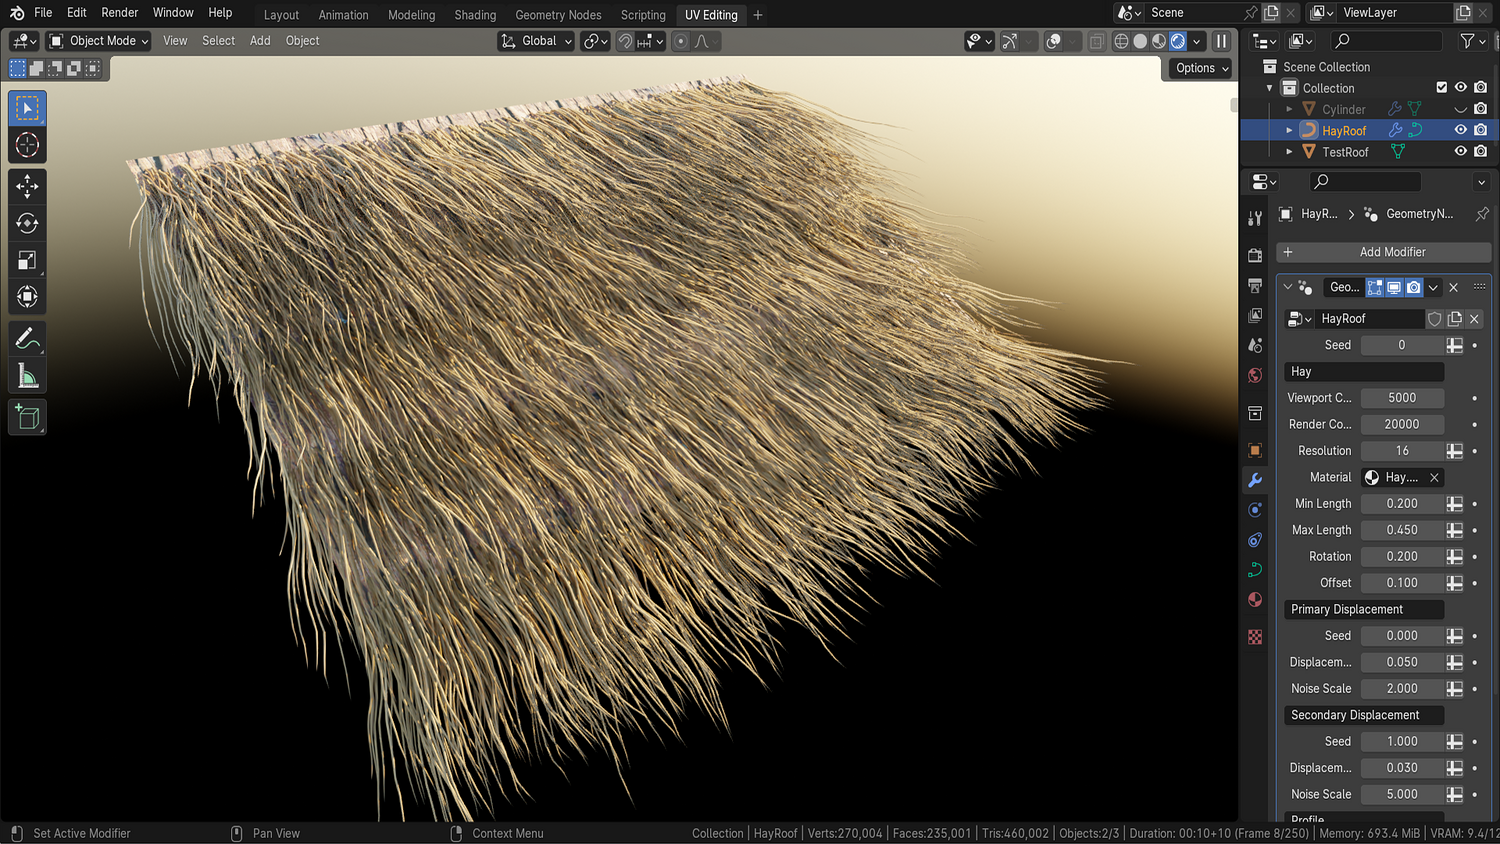
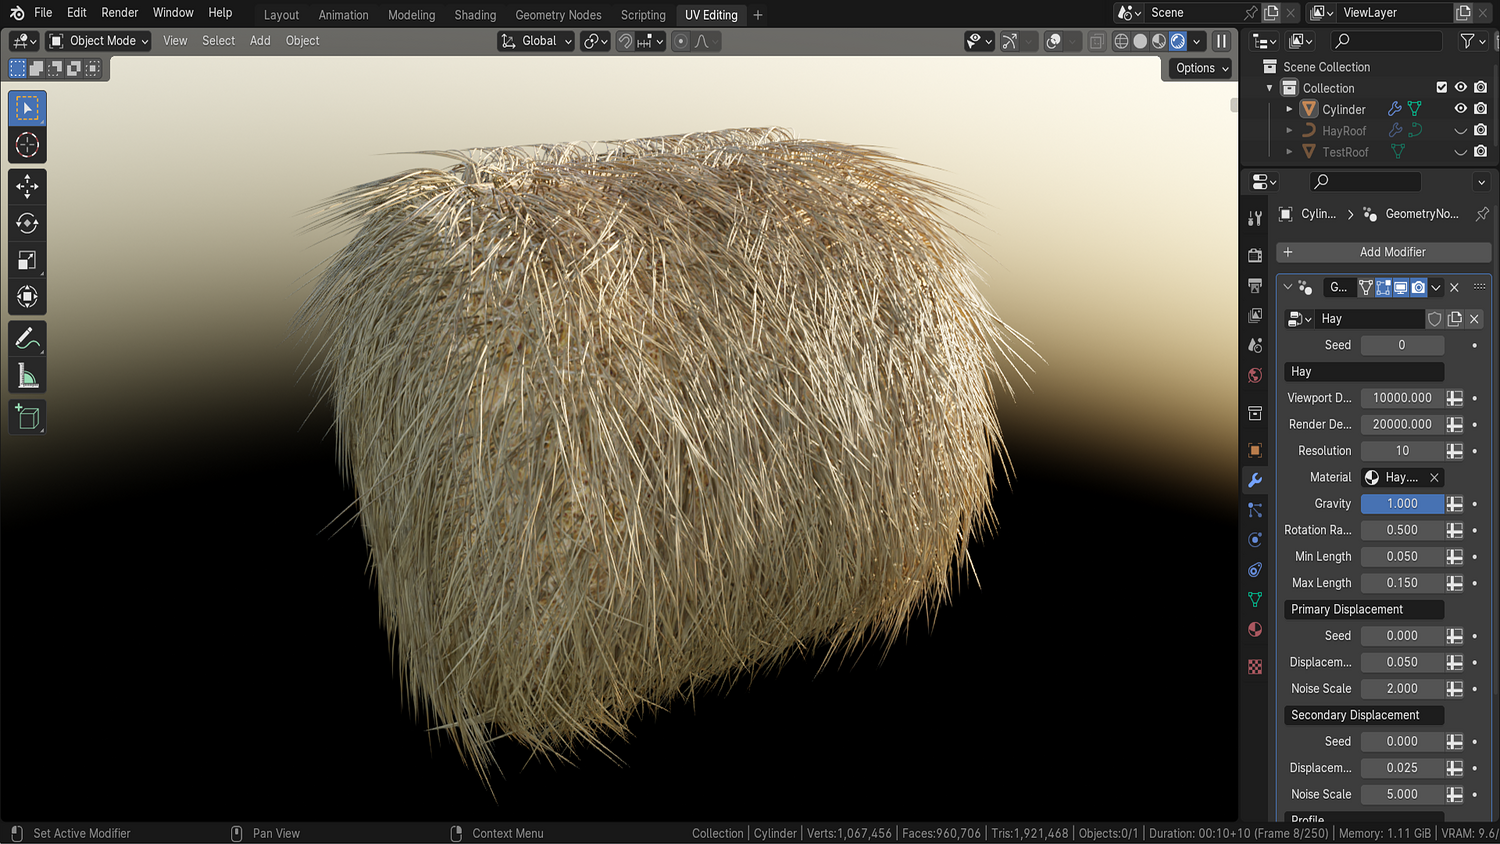
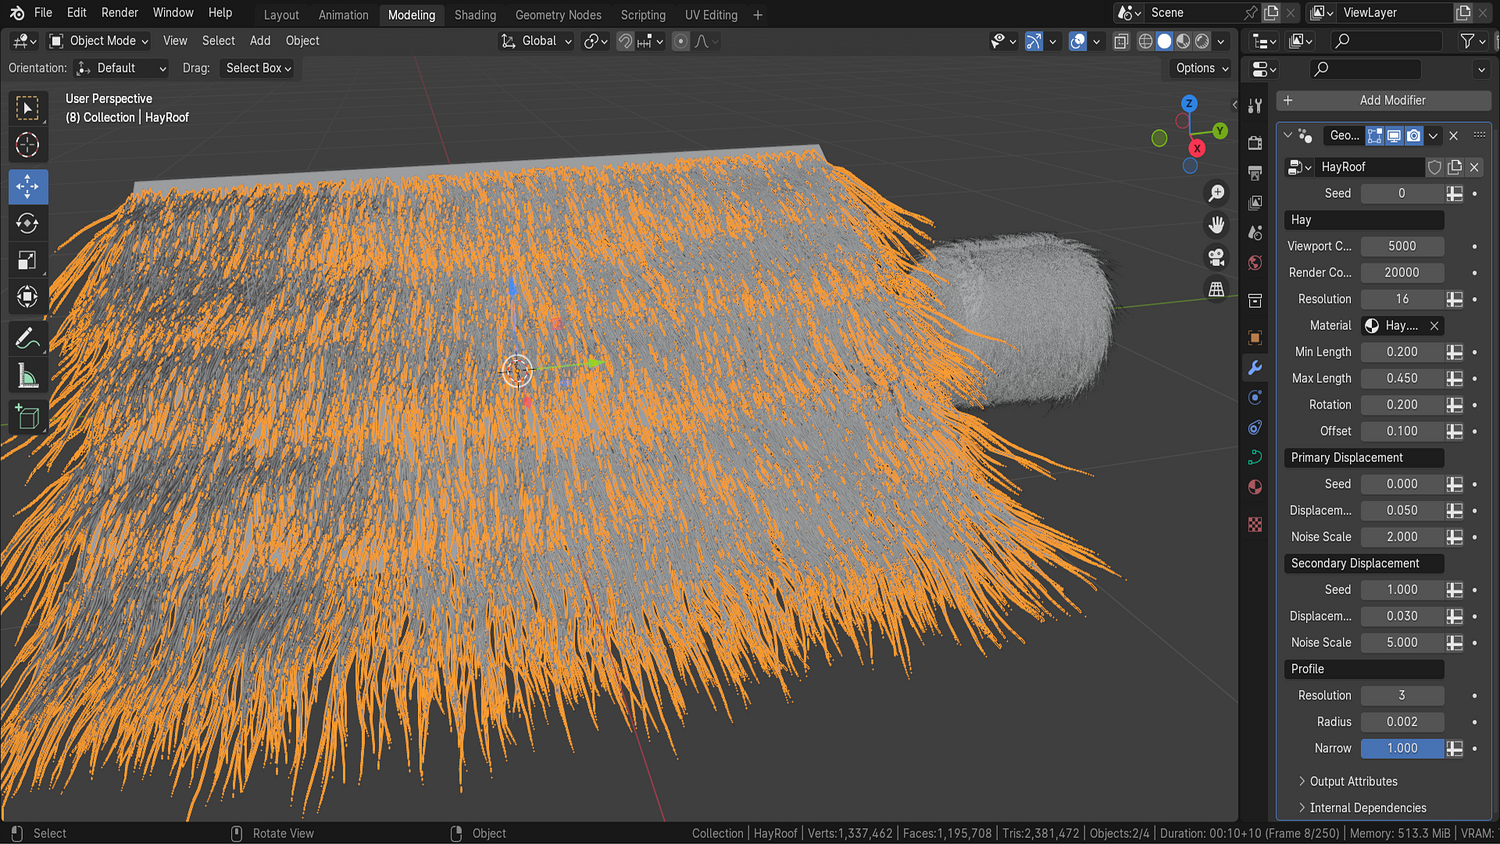
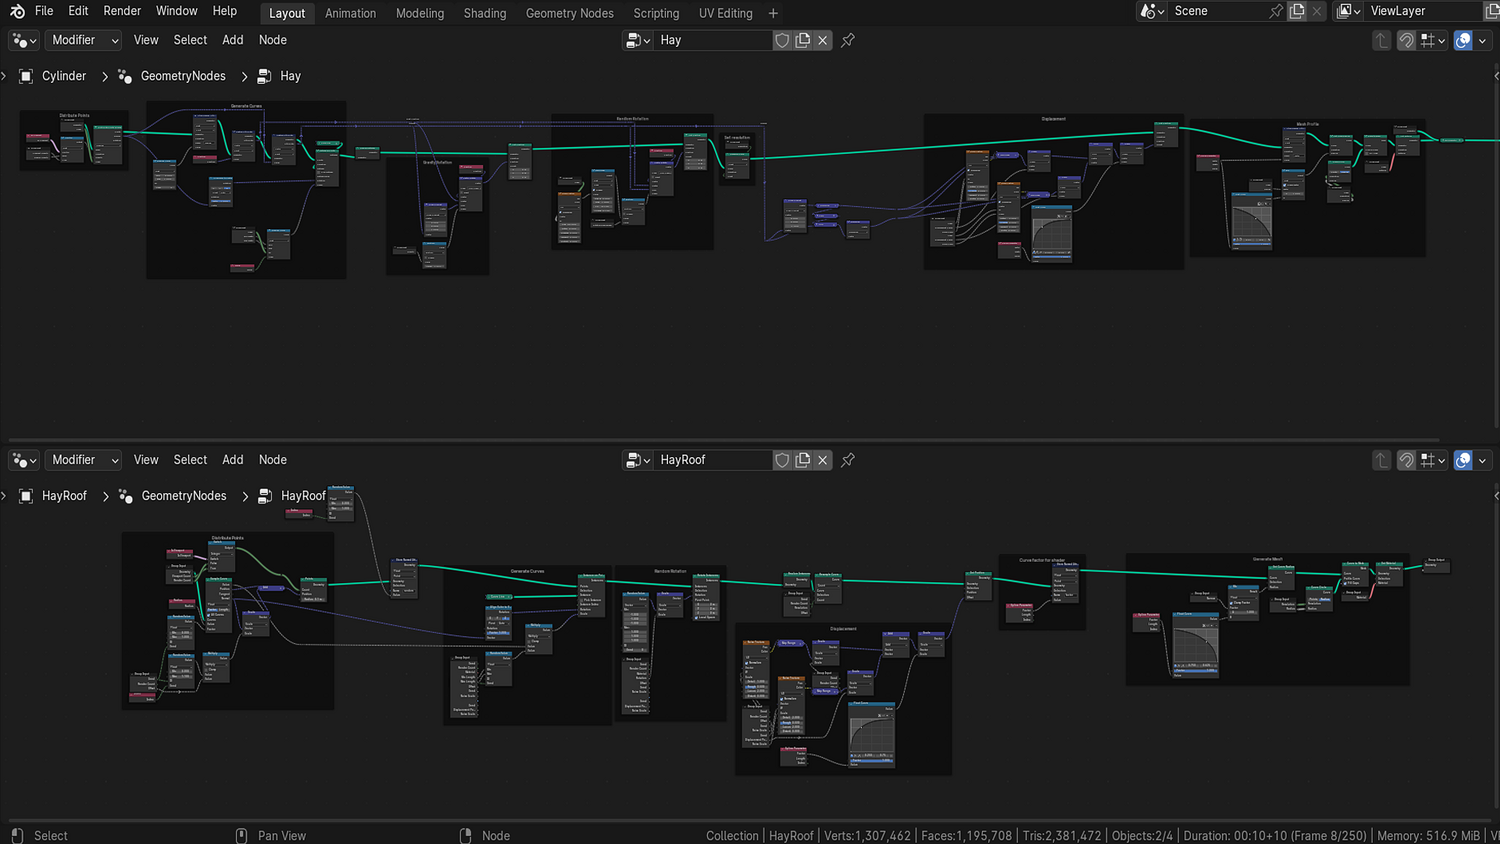
One-Click Hay Generation
Add hay to roofs, bales, or meshes instantly — just apply the geometry node and it’s done.
Gravity-Based Control System
Adjust gravity to bend hay strands naturally — from upright spikes to sagging, rain-drenched curls.
Random Rotation & Length Settings
Add realism with per-strand randomness and dynamic rotation toggles — perfect for stylized chaos or clean bundles.
Viewport Density Scaling
Keep performance high with adjustable density for both preview and render modes.
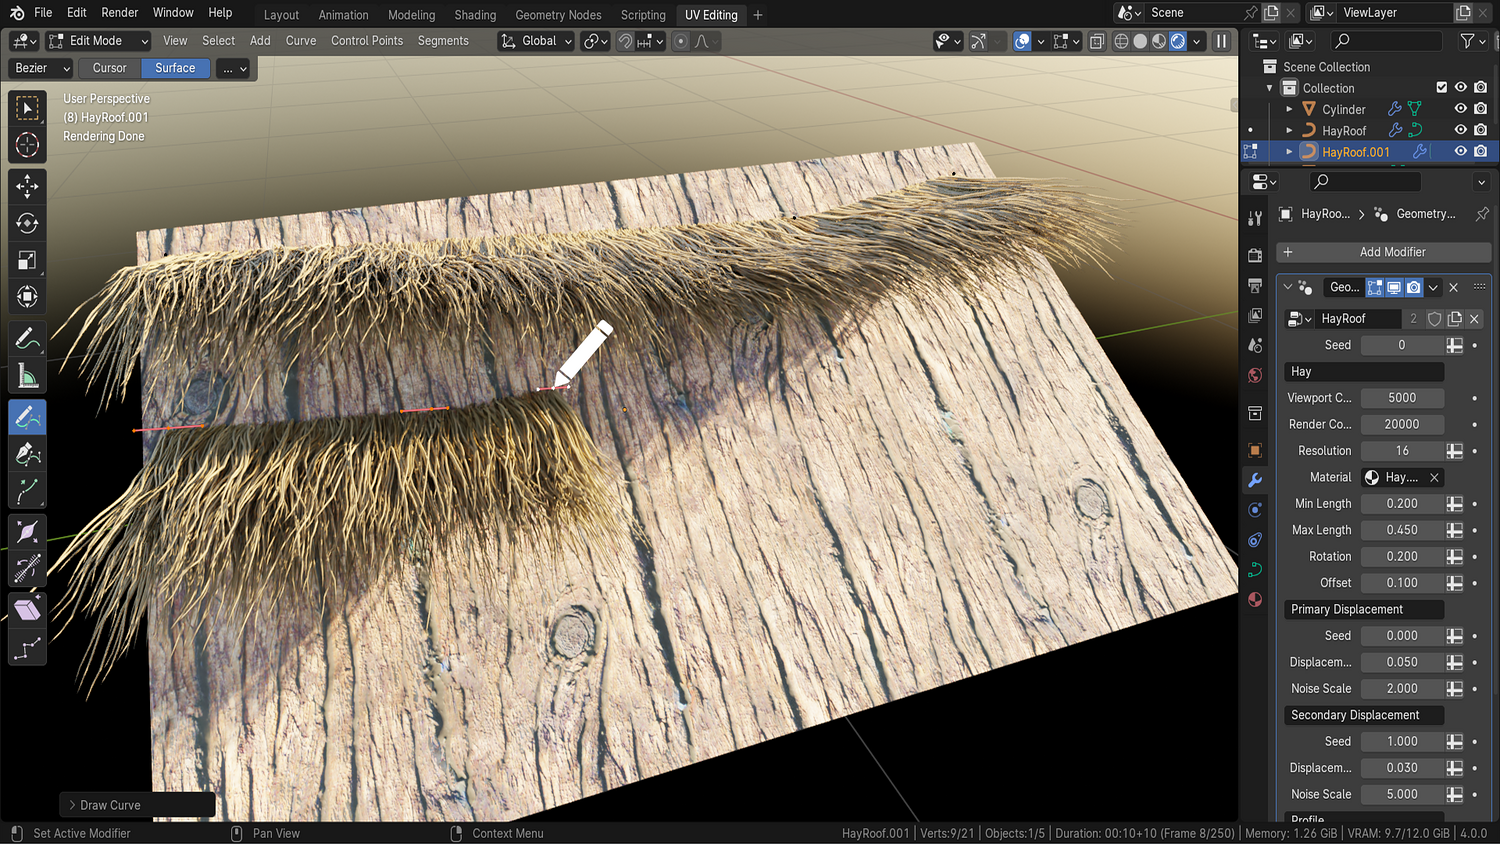
Draw Mode with Curve Input
Use draw curves to place hay manually in precise locations — great for hay troughs, loose piles, and artistic control.
🔥 Why You'll Love It

Perfect for Medieval, Viking, or Stylized Projects
Ideal for taverns, stables, hay bales, thatch rooftops, and historical structures.
Quickly Shape & Rotate Hay Meshes
Use edit mode and curve drawing to reposition, angle, or adjust hay paths in seconds.
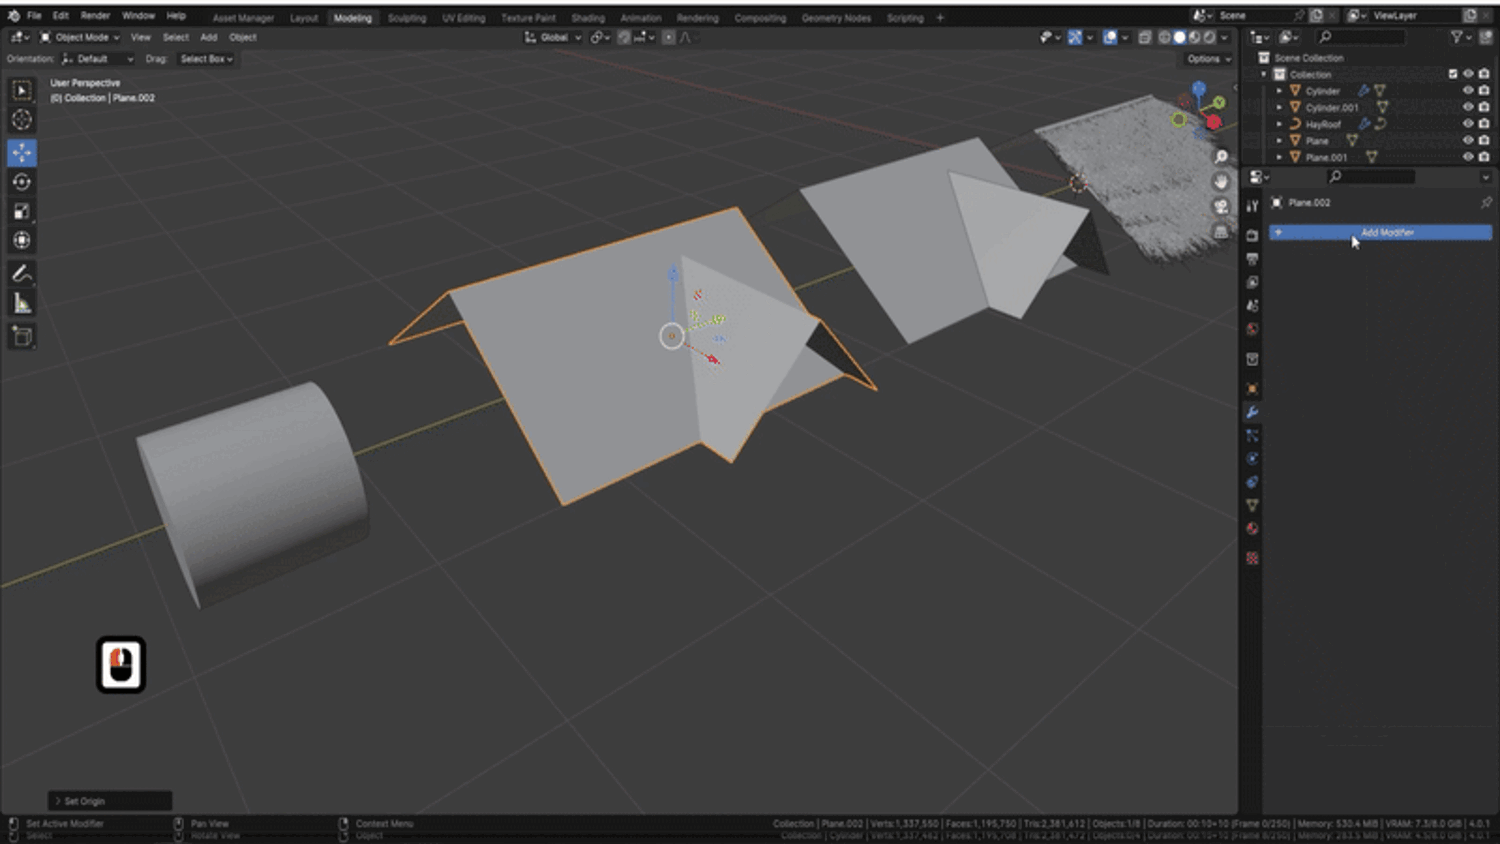
Switch Between Roofs, Bales, or Loose Hay
Works equally well for flat roofs, round cylinders, or manually drawn patches of hay.
Includes Two Stylized Materials
Apply included wood or hay materials — or use your own textures with UV-ready outputs.
📦 What's Included
- 1x Blender .blend file with Hay Roof Generator Geometry Node setup
- Drawable curve input system and mesh support
- Gravity, thickness, randomness, noise, and rotation sliders
- Two materials: stylized hay and wood shaders
- Prebuilt hay bale, roof, and patch examples
⚙️ Requirements
- Blender 4.0 or newer with lifetime updates
- From noob to pro — watch the 10 minute video to have everything up and running in no time
🚀 Installation Instructions
Method 1 – Add to Asset Library
- Download and unzip the product folder.
- Open Blender → Edit → Preferences → File Paths → Asset Libraries → click the "+" button.
- Navigate to the extracted folder and add it.
- Open the Asset Browser and drag the Hay Generator into your scenes.
Method 2 – Manual Append
- Open your Blender project.
- Go to File → Append → Locate the .blend file → Import the Geometry Node group.
Method 3 – Copy and Paste Between Projects
- Open the project containing the Hay setup.
- Select the Geometry Node group.
- Press Ctrl+C to copy.
- Open another Blender project and press Ctrl+V to paste it directly into your scene.
💬 Support
Need help? Join our growing 3D Tudor Discord community to connect with our support team and hundreds of fellow artists!
👉 Join the 3D Tudor Discord here
You will get 1 file
All files previously purchased will always be available for download in your Library