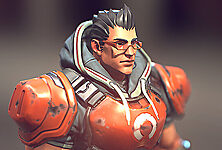
The Making of Art War 4 3D Finalist: Furious Fire Demon
Valerio is a passionate sculptor and video game player. After graduating from the AIV – Italian Video Games Academy, he participated in workshops and competitions on international computer graphics sites and forums, specializing increasingly in digital sculpture and the use of 3D in various areas of artistic work- from illustrations to characters for video games to digital sculptures for prototyping and toys.
He currently works as Principal Creature Artist for Petersen Games, as a freelance Character Artist in the video game field and in 3D printing, and as a Zbrush teacher for several Italian academies.
Here, he takes us through the making of Furious Fire Demon.
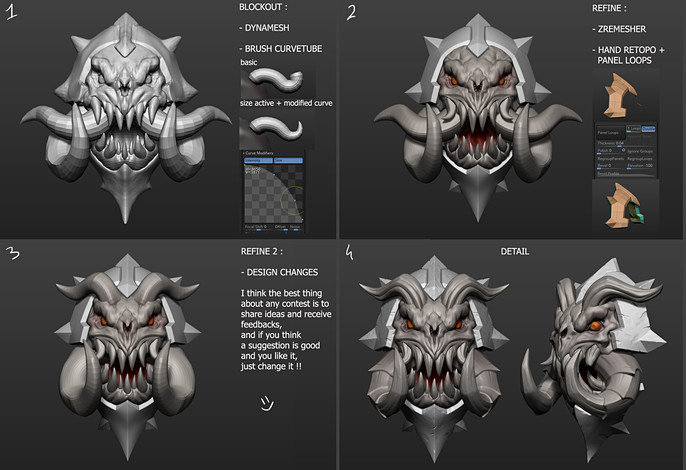
When I start a new model I always divide the sculpt workflow in three different steps :
- Blockout- usually full dynamesh, quick and rough, something like a concept in 3D, is the best way to feel free to create shapes and without worrying about geometry and tech stuff. For Stylized model this is the most important step, take your time and don't rush in this step, because you create your silhouette and your planes, details don't matter if you don't have a good blockout.
- Refine- In this step I retopologize (by hand or with ZRemesher) the hard surface stuff, and ZRemesh the organic stuff, so I can use the good topology to create edge loop, bavel, crease etc etc. This is a good moment to increase efficacy of your forms, make the shapes more angular, flatten the planes, create contrasts.
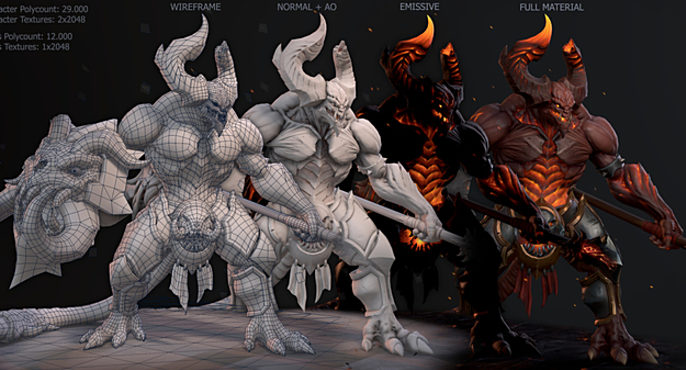
- Detail- now let's play with alpha and clip curve, sometime I like to just use the clay brush in Zsub with a lower focal shift, to create the stylized damage. Always keep in mind the distance at which you will see and the final size of your stylized model and don't create too much detail if the piece is small.
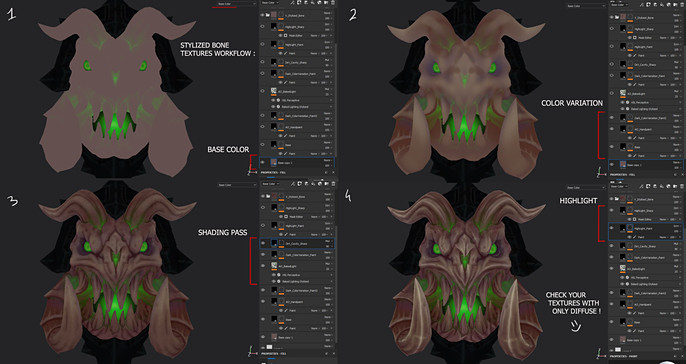
Regarding the textures for stylized stuff I always try to be methodical, it's important to start with a good chromatic variation, some hand-paint is required in this step. Then the shading pass, where I just using the AO to create generic dark spot, and some dirty generator (with cavity+ao+scattered dirt).
For sure is 90% dependent on your sculpt.
The highlight helps to make the top corners and details of the sculpt more visible, use the mask editor to isolate your cavity and clean the mask with a paint where the parts are hiding. Usually I add a pure hand-paint layer just to add the finishing touches with more light.
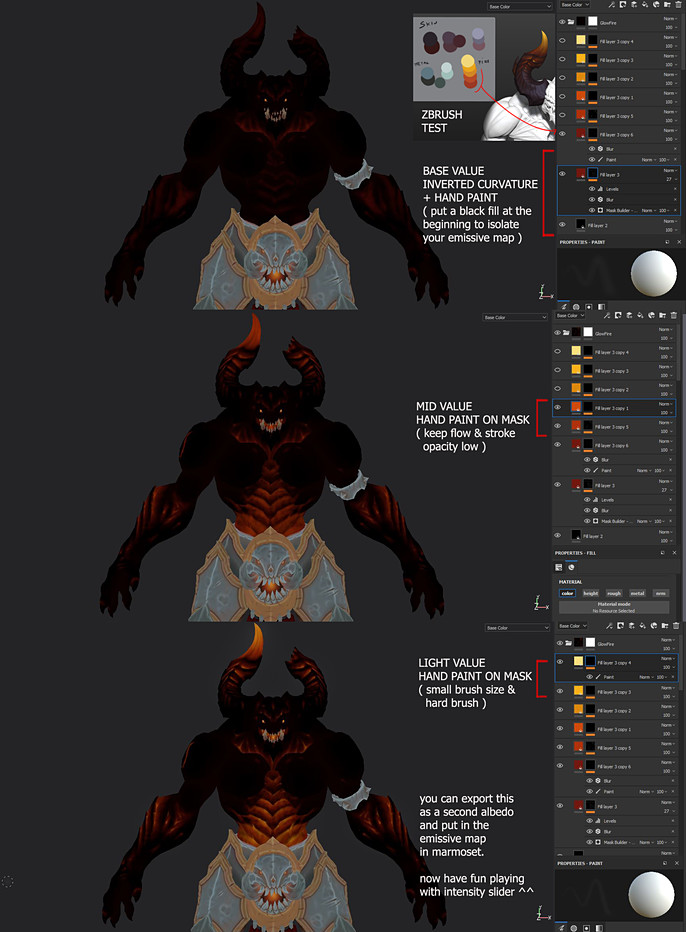
In this case the emission effect was very important, since the focus was to create something like a fire from the inside. I created a palette in ZBrush after some tests, then create a group in Painter, with a fill layer for each different color, and with different techniques I painted the emissive map isolating it from the rest of the textures.
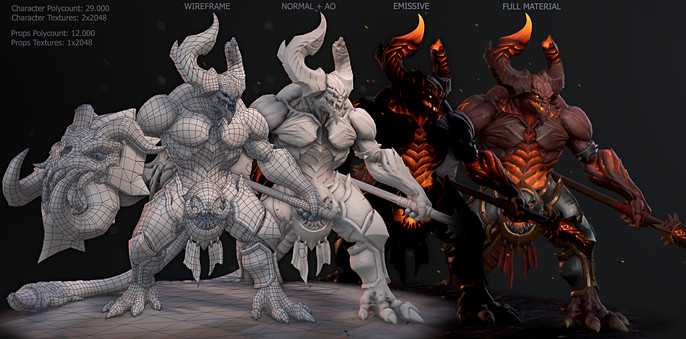
For the final render, as a realtime model, I moved to marmoset, where I tried to keep it simple, few lights to create the mood, a main light with a very light warm color, a two rim setup (the main rim cold and the opposite warm) and a soft fill light to fill areas that are too black.
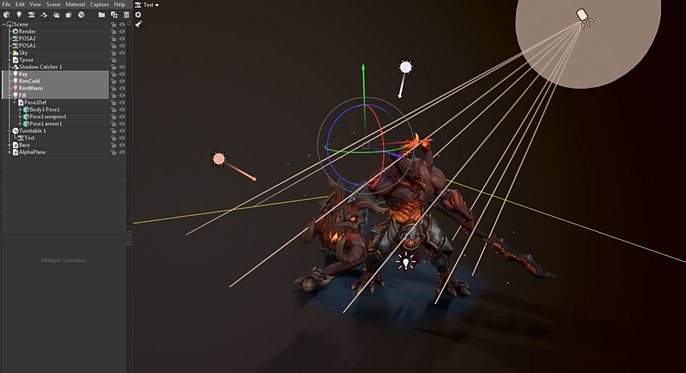
I personally don't like too complex renders or too strong lights, we want to see the model and the textures without being compromised by the lights.
Basically leave space for the model to speak for itself.
Follow more of Valerio's work here:
https://www.artstation.com/korax
https://www.facebook.com/valerio.carbone88
https://www.instagram.com/valerio_korax/