The Making of Art War 4 3D: Troub’Ador
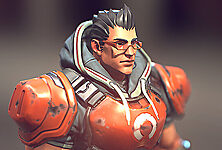
Ricardo Viana is a Brazilian self-taught 3D character artist, living in Belo Horizonte, Minas Gerais. After graduating with an Animation Cinema Degree, he began working in the industry as a freelancer. Viana's first contact with CG was with Blender which is why he used Blender Eevee for rendering and Blender itself in the character.
In this breakdown he discusses his approach in the Troub'Ador character, explaining his intentions and why he made some curious steps.
THE CHARACTER
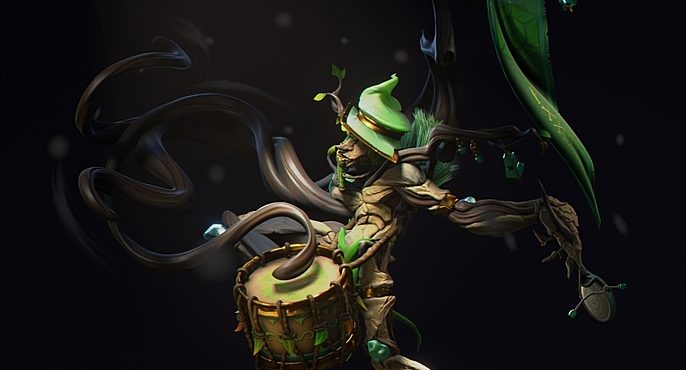
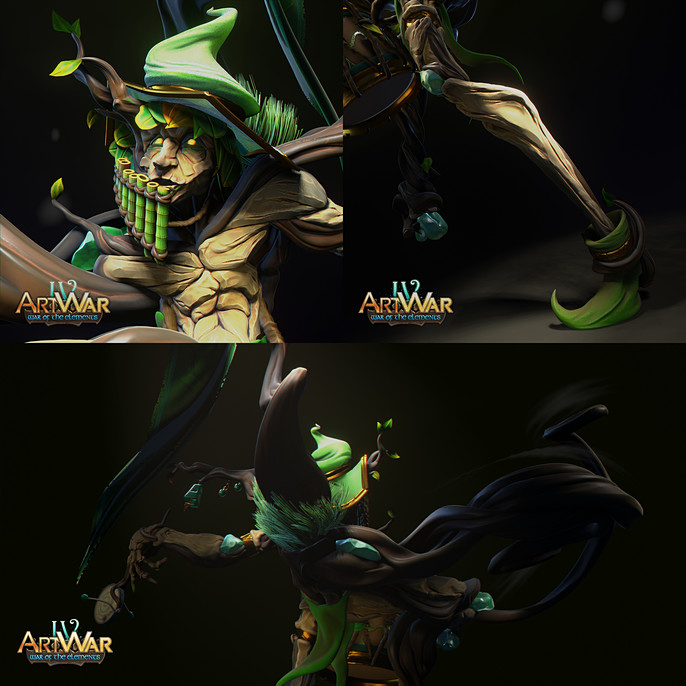
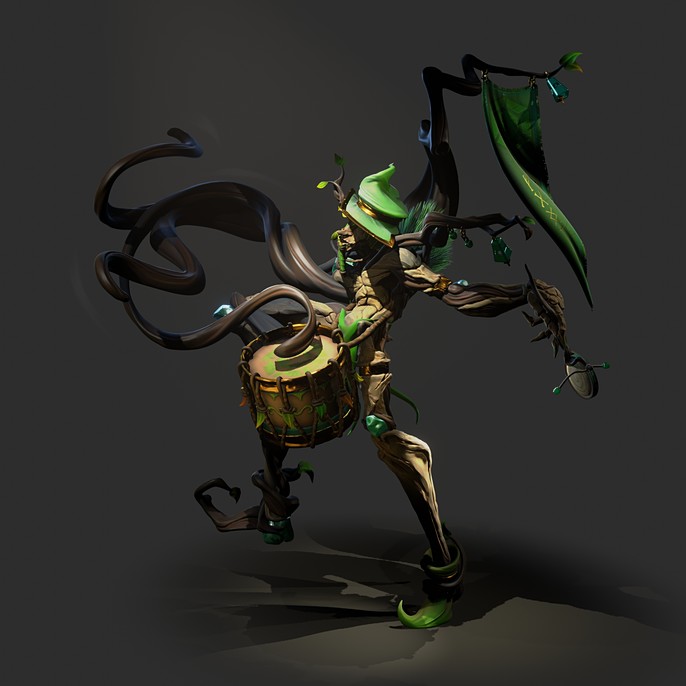
Troub'Ador is the main and only official fanfare member from the Earth army. The reason he plays alone is obvious: he's a gigantic ent like creature, enchanted (or cursed) by the earth gems and flora. His right side is much more affected than his left side. His right arm is a set of roots, which he uses his drumsticks, while his left arm still has a hand, occupied with some noisy trinket.
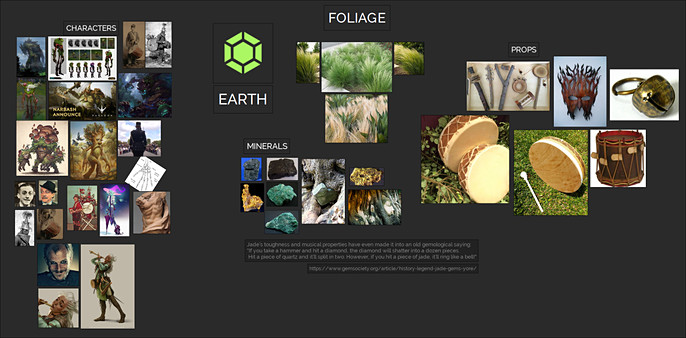
With some research, I've seen that jade has some musical properties, that's why I've chosen it as the gem in his body:
Jade’s toughness and musical properties have even made it into an old gemological saying: If you take a hammer and hit a diamond, the diamond will shatter into a dozen pieces. Hit a piece of quartz and it’ll split in two. However, if you hit a piece of jade, it’ll ring like a bell!"
THE DESIGN
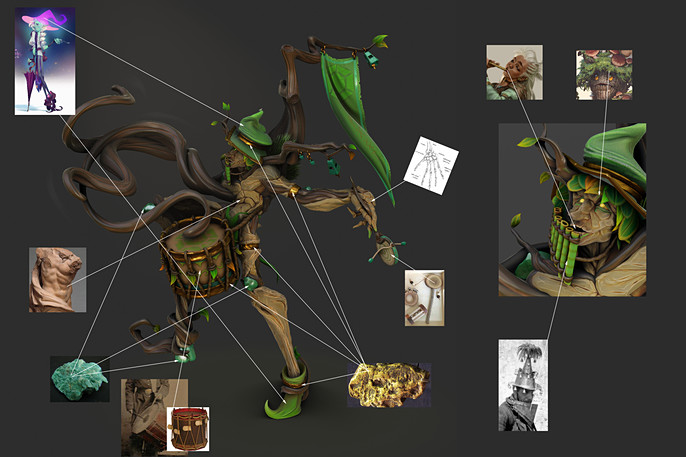
My first thought was to make a one-man-band with an ent like creature. I researched some earth element related images and that’s how my reference board looked at the end:
I thought a lot in the design, but as I don’t have 2d concept skills, I had to sketch everything in 3D (using ZBrush and Blender). There were a lot of stages before I reach the final design, which was the one in my head.
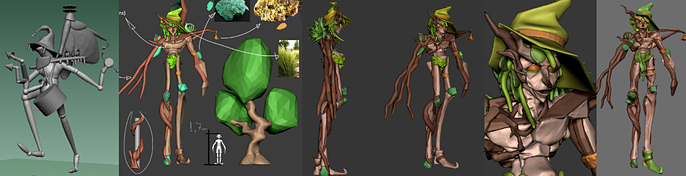
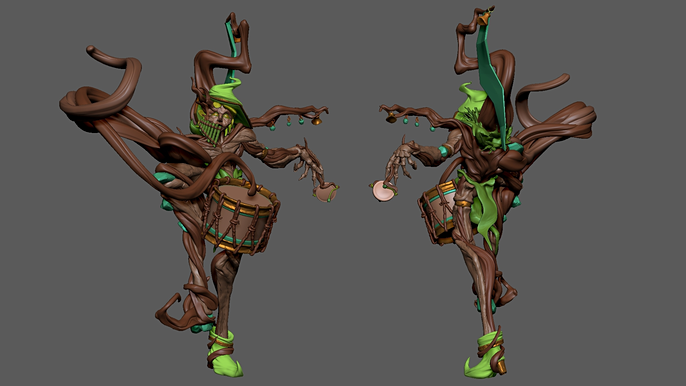
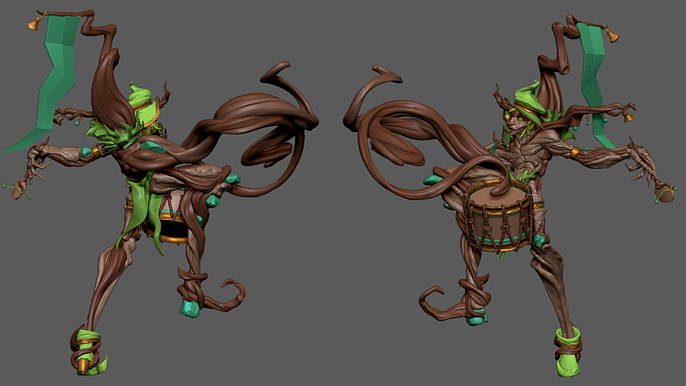
When I finally made it, the biggest challenge was to pose and refine the model, what was really hard cause it’s a completely asymmetrical character, with very dynamic shapes and details. Here’s how the final model came out in ZBrush viewport.
In this plate you can check the full relation character ~ materials/references:
THE POSE
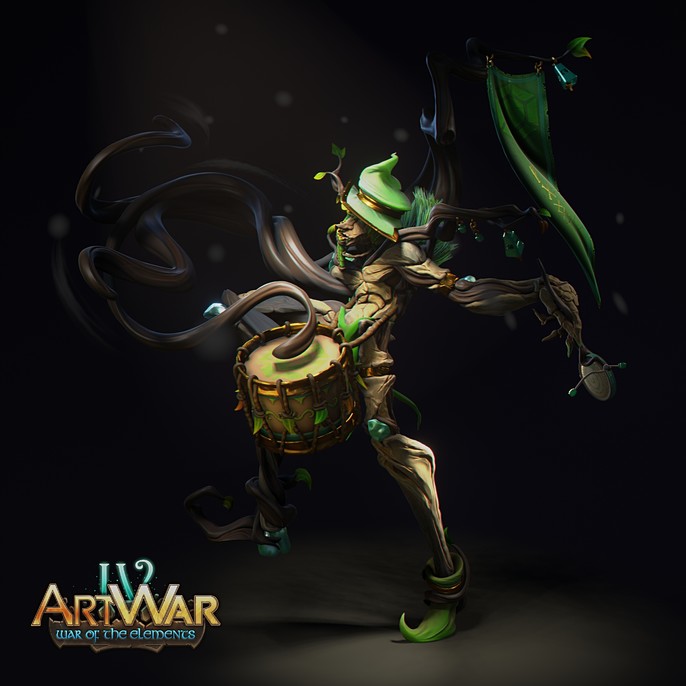
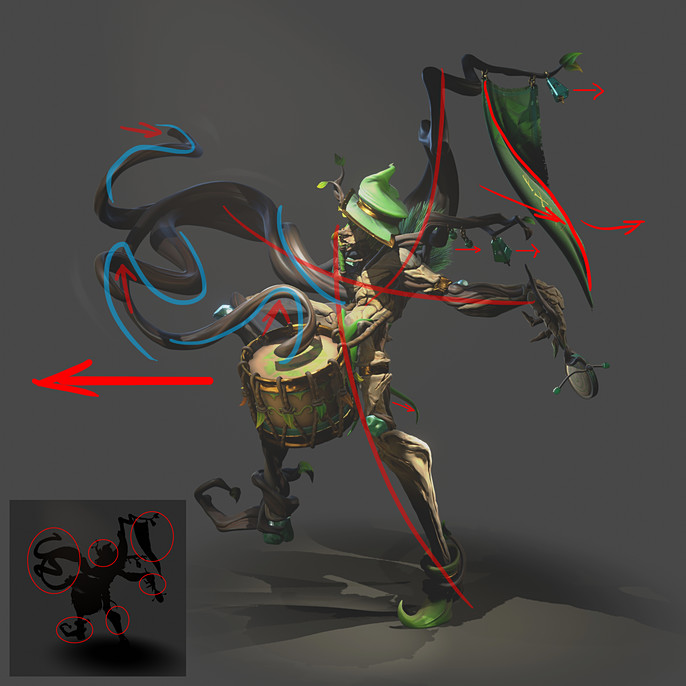
My intention with the pose was to make him like he was marching, so I tried to make a pose indicating the path he was making. At the same time I had to make the silhouette as clean and readable as I could.
As he’s a creature of the nature, in the still render I thought it would be a good idea if his forms looked like a tree but suggesting his anatomy. You can check what I tried to do with the shapes to suggest movement and anatomy/storytelling in the image bellow:
THE TEXTURING
In the contest days I had some contretemps. My pen tablet just stopped working and I felt really discouraged to continue with the character since I was in the modeling stage and I completely depended on the tablet. The solution I found was to work the polygonal models (props and leaves), make the procedural shaders and the smart materials in Substance Painter while I waited for the new tablet to arrives.
With this in mind I made the character materials replicable so I could use the smart materials correctly. You can check in the next image that he had 5 main materials:
- The one I called “roots materials”, in the dark brown parts such as his muted arm and the tree in his back
- The one I called “wood materials”, the lighter one, in his more anatomical shapes
Fabric materials (hat, flag and boot)
Gold materials (hat borders and bracelets)
Jade materials (jade stones stuck between roots)
Some jade and gold materials were made procedurally in Eevee with three planar projection, such as the bells in the trees and the rings holding those.

Example of the smart materials running in the character.
Smart material steps
THE LIGHTING
This step was one of the most complicated, because I was running out of time. My intention was to make a simple lighting, with no colors, making the character textures pop up, once I worked the color map a lot. But when I made it I thought it was not enhancing the character sufficiently. It looked too still, the light was not telling anything, besides the fact I would need to make a more stylized/baked light texture to work like this.
Then I thought a spotlight, spotting his face and core shape would make the reading of the character clearer. Different shadow/light values would help to make the “wow factor” (which was one of the judging criteria).
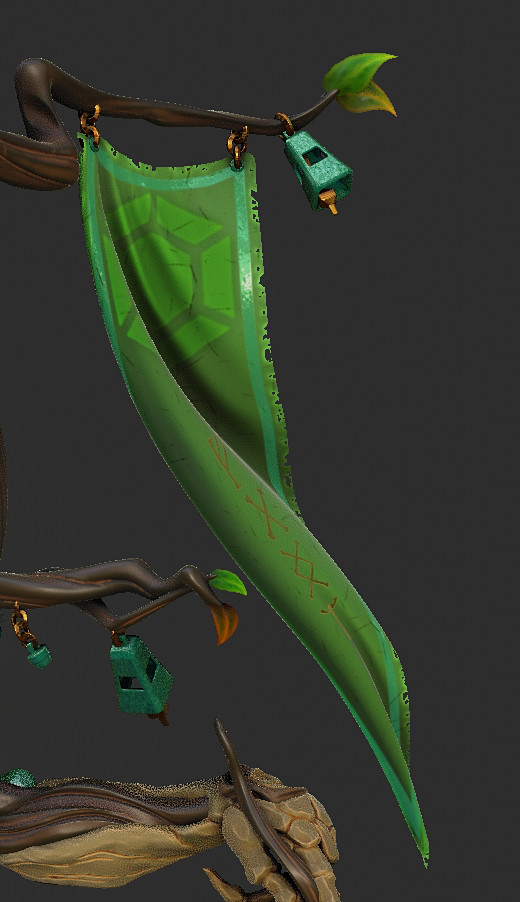
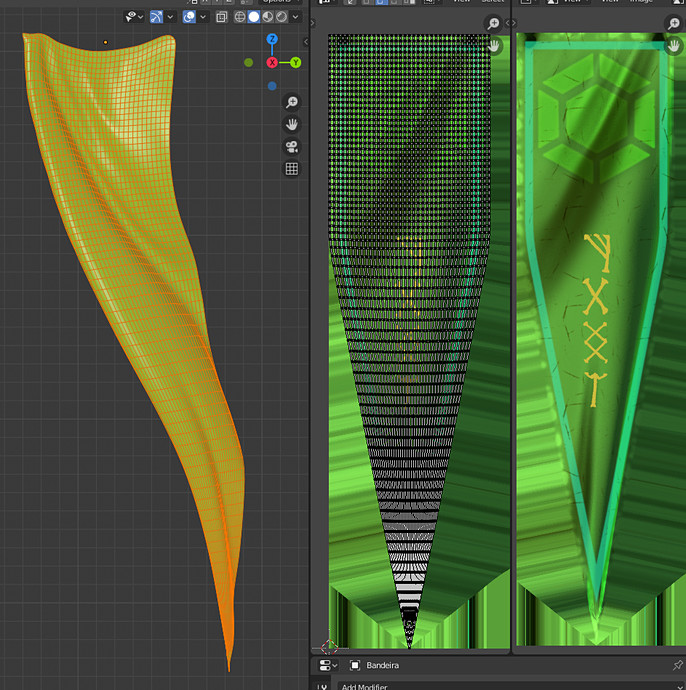
THE FLAG and THE LEAVES
In the last few days I still had to make the flag and distribute the leaves/grass. I wouldn’t have the time to sculpt a flag with much details, also I was too tired for that, so I used a simple Blender cloth simulation. The details was made with Substance Painter, using opacity mask:.
Making the leaves was the funniest step. At the time I was with the broken tablet, so I worked a lot to optimize time. Leaves are hard, we always expect to see different colors and shapes and I had just this base leaf.

This one is a 512x512 texture made in Substance Painter. Normal map was baked from a simple symmetrical leaf model to a plane. All the other leaves have the same settings, unless the grass, that is a single grass leaf, which was duplicated via shader.
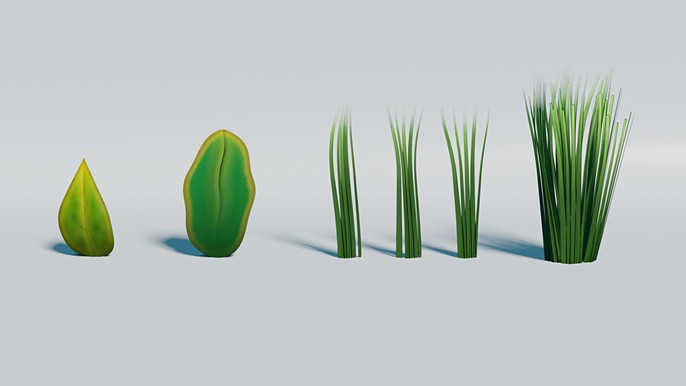
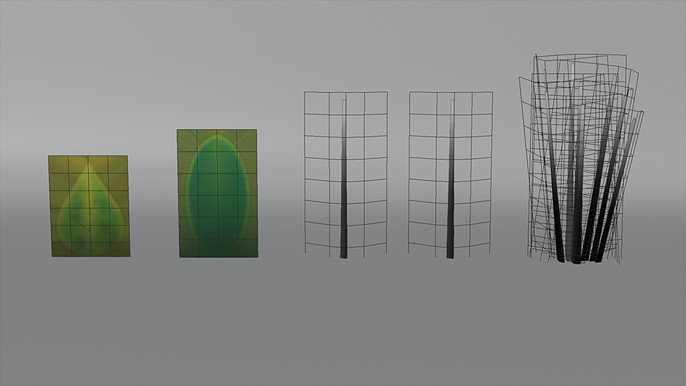
I will let the media speak by itself. The following show how the leaves worked.
The shader randomize the basic silhouette shape and colors (set from green to orange). The leaf bend was made with Shape Deformer modifier (Blender).
I had to use the geometry random and clamp this value to have basic control of the randomized number (0.0~1.0). Subtracting the separated translate values of the UV coordinates with a procedural noise texture, I could make a very unique leaf shape by simply duplicating the mesh. This shape was set and randomized by the mesh data name, so if I needed that very shape again, I just had to copy that leaf data.
Another interest shader is the grass one. As I had mentioned, the grass was made with only one basic texture, that was duplified procedurally. This way I could make really interesting grass shapes with total control of this color and shape, from root to tip.
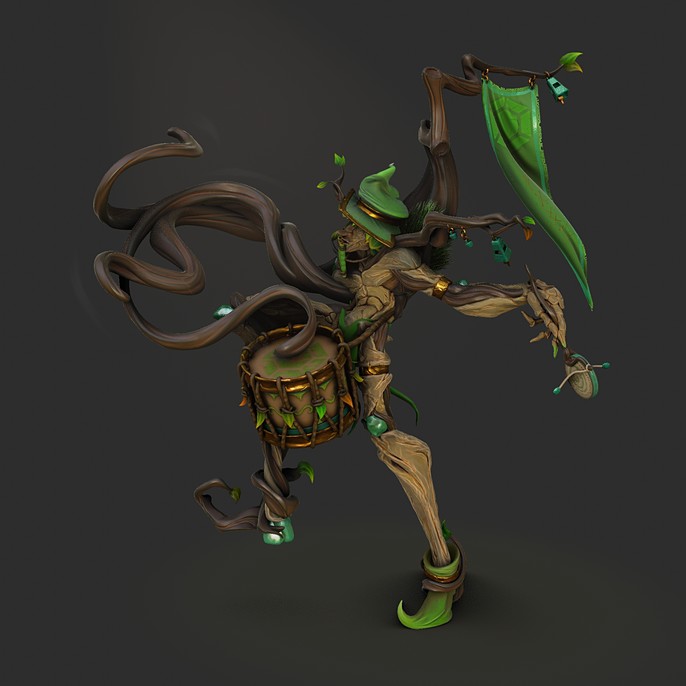
THE FINAL RENDER
Turntable_Inicial0001-0555.mp4
Well, this is it. I’m really happy that I’ve made it to the finals and really honored to receive this invite from Cubebrush to making this breakdown. If you interested in the Blender Eevee materials from above you can contact me and I’ll be pleased to share it.
Hope you guys have enjoyed!
See more of Ricardo's work here.