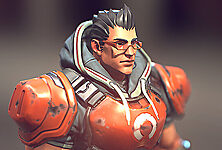
The Making of Art War 4 3d Finalist: The Cursed Fairy
Antonio Esparza is a Senior Character Artist at IGG 7+D and a 3D Character Artist & 3D Concept Artist at Massra Studios. He began working in the video game industry 3 or 4 years ago and 2 years ago was fortunate enough to win the Art War II challenge with his 3D character, Vri'el Lord of Time. This ultimately helped him land some of his first jobs and a small place as a 3D Artist. Now, he's thrilled to once again be a finalist.
Cubebrush’s “Art War” competition has always been an incentive when it comes to participating, since the topics that are chosen, in this case “Elements”, allow within a framework to be really creative and to take your ideas and capacities to the extreme. This is due to the fact that with little technical limitations and having to focus on one single image, you can create amazing creatures and characters; you just have to look at the finalists to observe the incredible level of my challenge colleagues.
We shouldn’t forget about the amount of prizes that you can get if you get to the top places, which motivates you to work harder, be creative and take your limits to the max with a helpful community, always ready to give tips and feedback and full of amazing artists.
The Making Of:
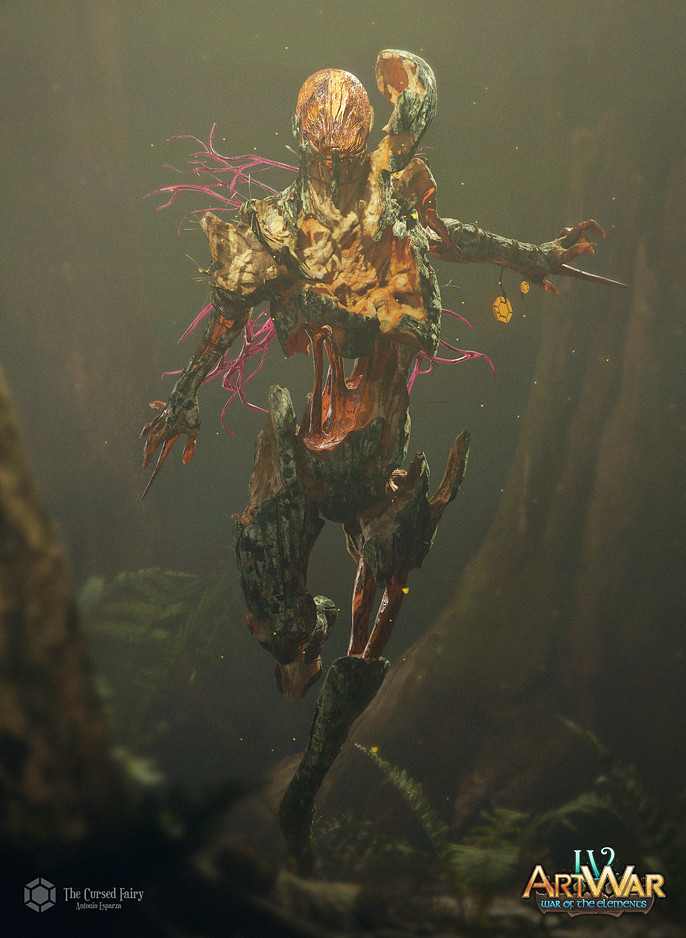
Today, I'm bringing you a little making of tutorial of my character for the Art War 4 challenge called "The Cursed Fairy", a killer fairy fueled by dark magic.

Stage 1 : Earth Element Earth - Forest - Plant - Insect
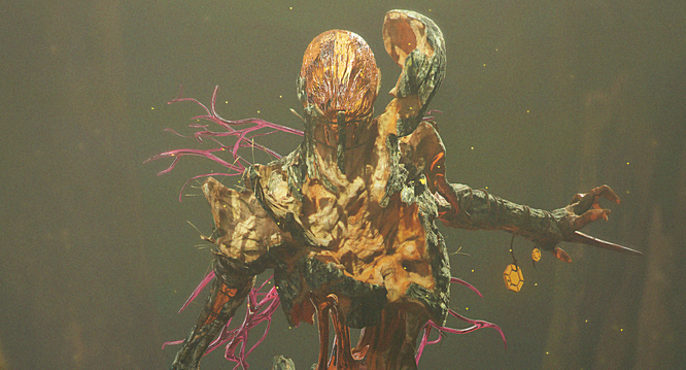
Concept: To create this character, I was inspired by Tolkien’s writings about the black forest and it's creatures, as well as the Carnival Row series and Hellboy’s troll market and Trollhunters. This colorful mix of fantasy with darkness, blood and demons is something that has always fascinated me.
I began thinking about creating a fairy but creepier, like the toothfairies in Hellboy, until, while I was searching for references, found “Book of the Dead” and thought, a wooden fairy, what could I add as the creepier part?
It’ll not only have a human-ish body, but it’ll work like a butterfly. A killer butterfly.
They have multiple stages in their growth until they become adults. When they’re young, they’re covered by wood, more protected, their skin is tougher but they move slower and possess less magic. When they’re adults, their wood falls off until they uncover their interior formed by sap, which allows them to fly, use a very powerful magic, but they’re easier to break and die, which is why some of these fairies end up corrupting themselves because of their fear, not leaving their wooden body and covering their magic of pure darkness.

Stage 2: Design and Sculpture
I usually begin with the head or the upper part of the character, especially when I begin working on a conceptual sculpture that isn’t very defined since the beginning, as I tend to look at the faces before the general design. There are times where I even focus on almost finishing that part before developing the design itself to know how it’ll work on the character in the end.
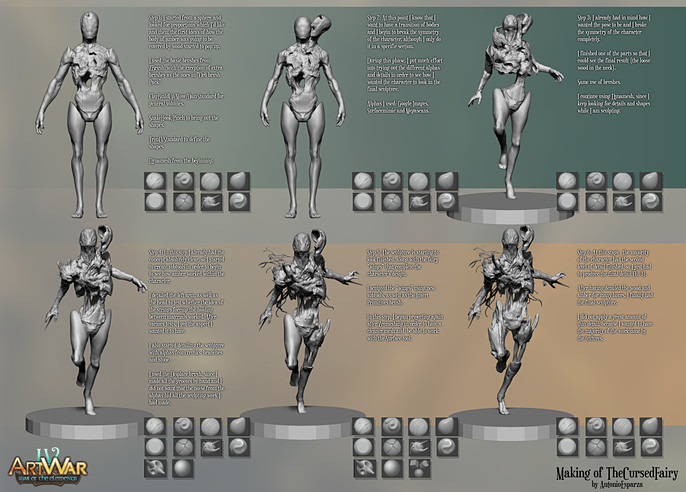
Final Sculpture
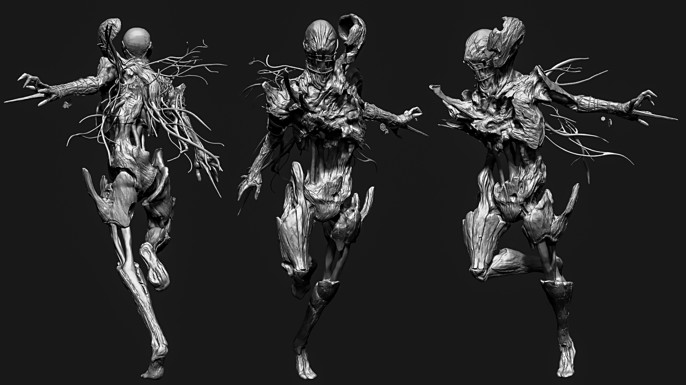
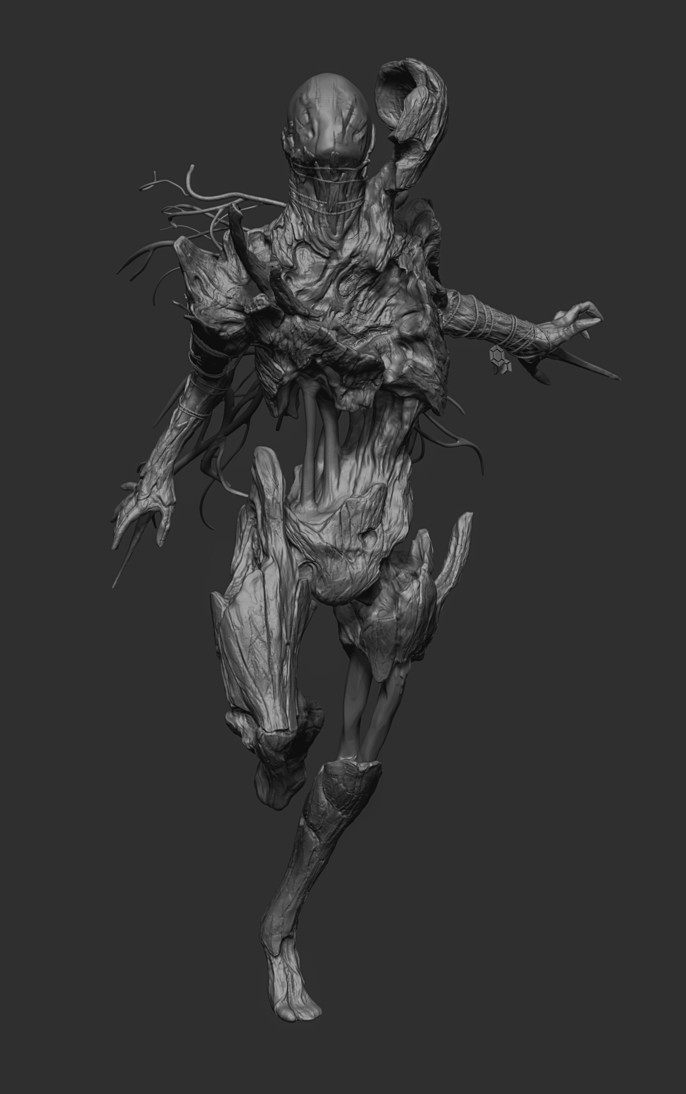
As I was sculpting, I had some doubts in my head: how did I want to present the character? What about the pose? How was it going to attack? Which colors was I going to use? Which weapons?
I like to present my characters doing a certain action over a presentation pose, as I think they have more to tell that way than with a simple image, so getting the right pose was very overwhelming.
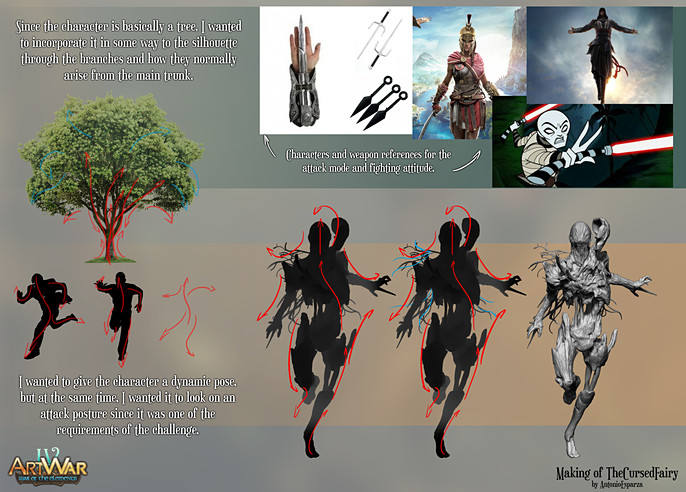
I ended up going for this pose with an Assassin’s Creed feel to it with the hidden blades but attacking from below, as if someone was hiding in a tree branch or a tree and this cursed fairy was attacking from behind while the sunlight reflected the leafs in the amber as if the light couldn’t completely penetrate trough the whole forest.
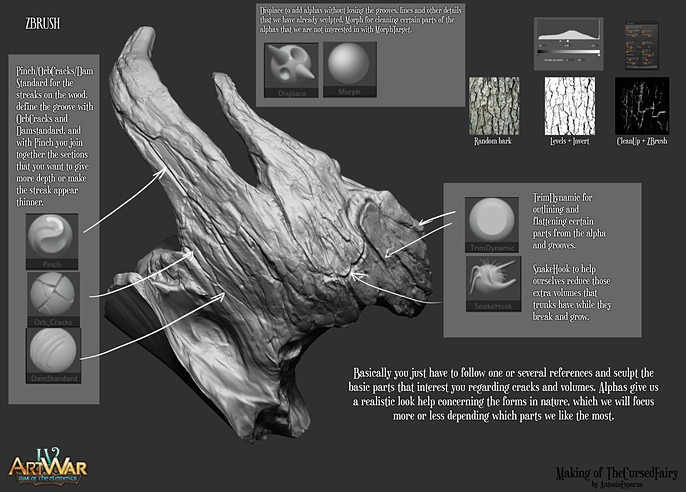
Stage 3: Textures
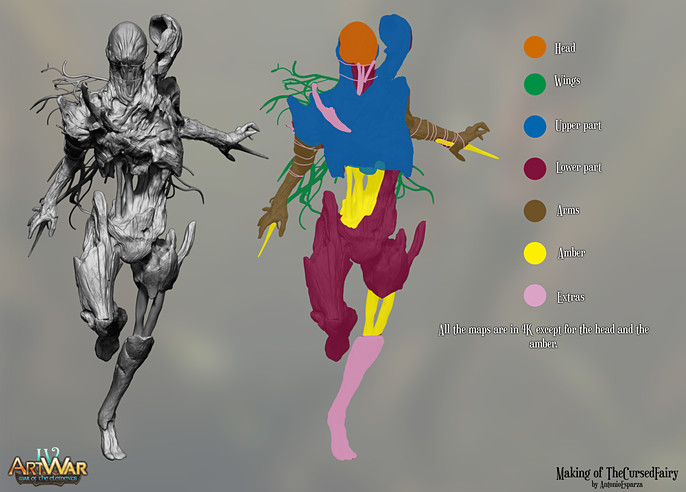
Let’s talk about topology. I used ZRemesher inside ZBrush and fixed almost everything in 3dsMax, but since the poly count wasn’t a factor in the challenge, I didn’t spend time making good looking, clean topology. I organized the UVs in UV Layout like this:
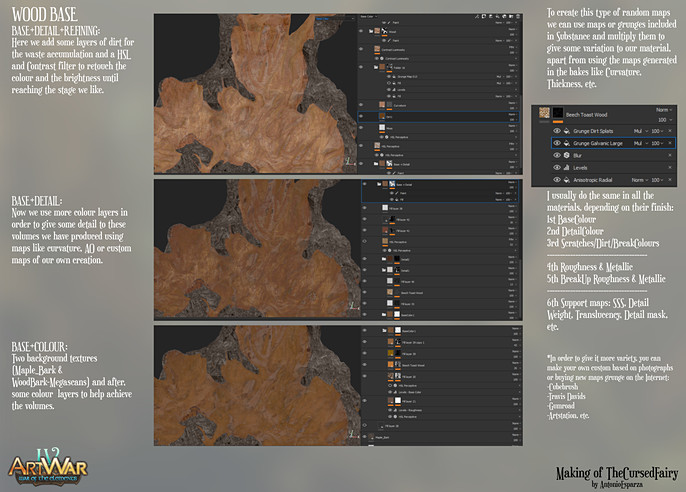
Regarding the textures, I tried to make it look as realistic as possible, using Megascans textures as a base or using images from Google or Pinteres as a base for the color or creating random normals with B2M.
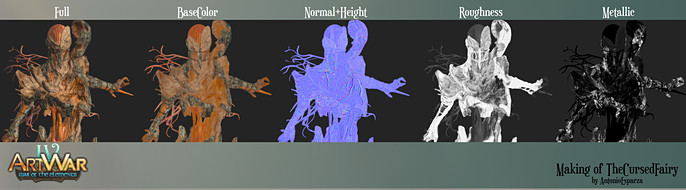
The texture is something that requires a lot of work even if it gets a little repetitive. We tend to use the first thing that comes to our mind but it's a long process. Here's how I usually manage and create my characters' materials:
Stage 4: Lighting and Presentation
For the lightning, I used 3 simple point lights mixed with the base Sky I used to define the silhouette a bit more, since the main light was the one that had to create the effect of light going through the leafs of the trees, and I used a leaf alpha to smooth the light's intensity.
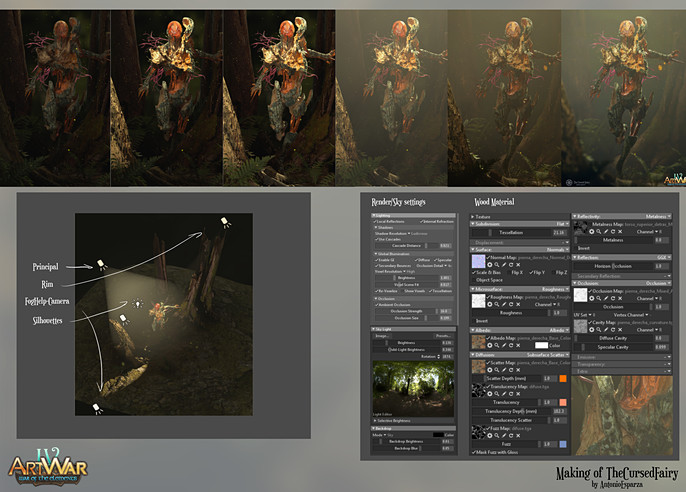
A little bit of fog here and a little more of depth of field there and we have our final image. Thanks a lot for taking the time to watch and read this making of, I hope you find it useful.
Cheers.
Follow more of Antonio's work here: