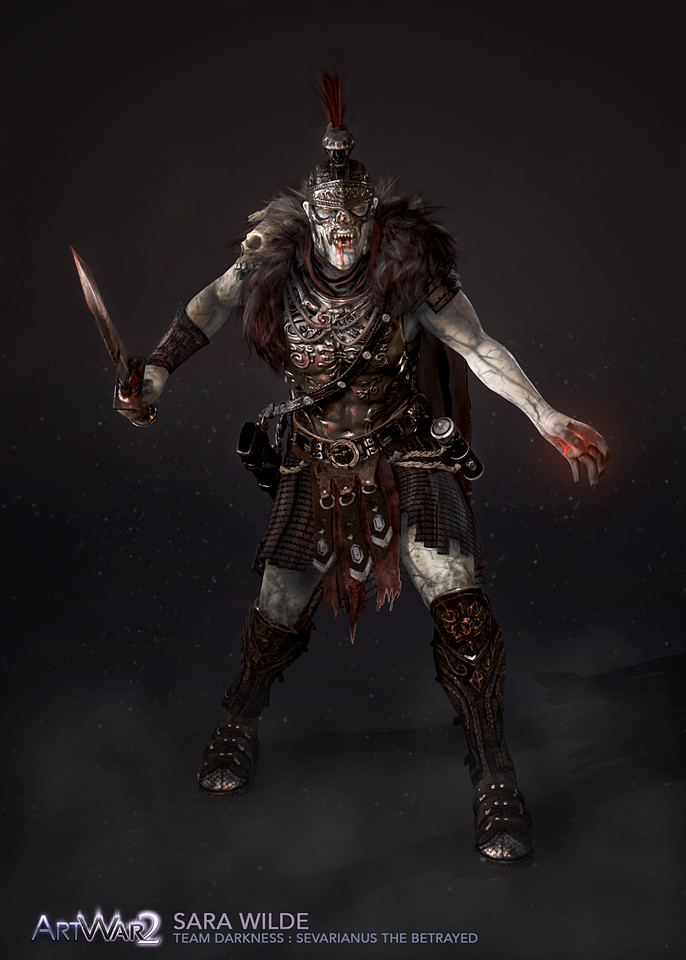
The Making of Sevarianus the Betrayed
Sara Wilde is a 3D modeler and texture artist based in Winnipeg, Canada. With three years industry experience working in games and animation, Sara can't wait to see where this industry takes her. She's also an avid coffee drinker, travel enthusiast and cat lover. In this great walk through she takes us through her thought process for the making of Sevarianus the Betrayed.
Overview
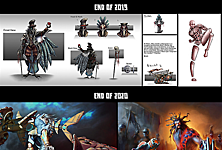
I am always grateful for the people or the events in my life that push me to work harder, work smarter and improve as an artist. For the last couple of years I’ve been working full time for video game studios and have found my energy for large side projects lacking. CubeBrush’s Art War and Art War 2 have acted as just the catalysts I needed to push myself even harder and get some cool/weird projects finished! This is a look at my process from start to finish creating this creepy dude I affectionately call Sevi.
Concept/Research
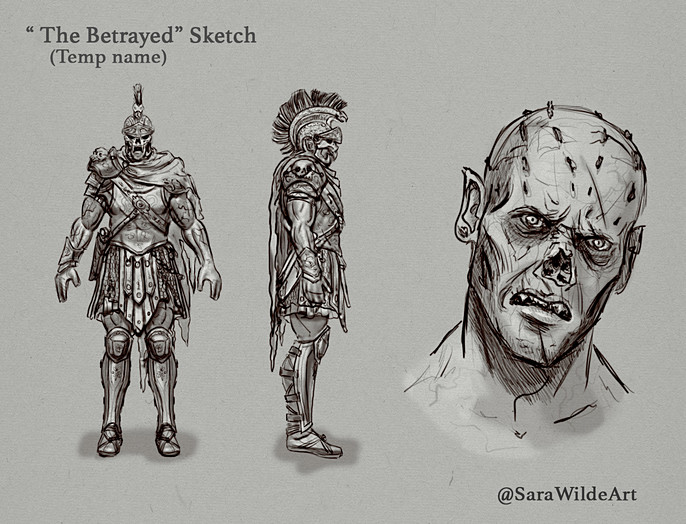
It’s always vitally important to start off with a strong concept, thorough research and a solid sketch. If you skip this part of the process you’ll likely end up with one of two things: an uninteresting and uninformed character design, or a lot of late-in-process backpedaling when you realize something either in the design or in the concept does not work. Take the time in the beginning, solve these problems early, and it will benefit every part of your workflow.
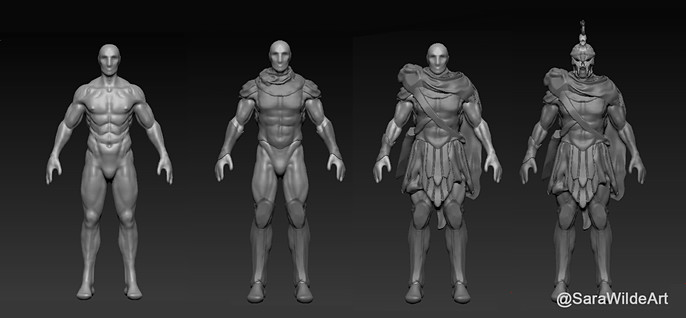
For the concept art I started with pencil sketches and then moved on to a clay blockout in ZBrush. Pictured is my clay blockout with sketching over top done in photoshop.
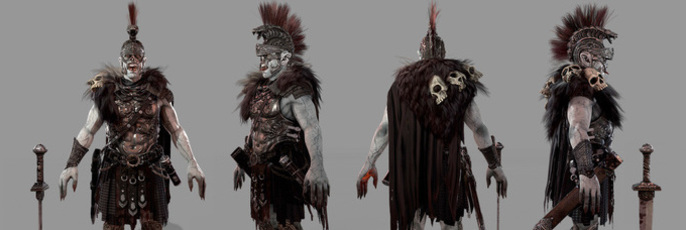
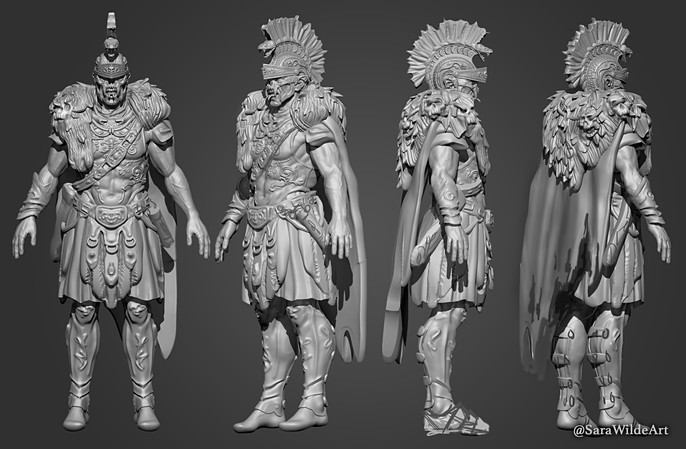
Planning out Sevarianus I went with a concept I’d had rolling around in my head for a while. I’ve always been drawn to historical and societal un-truths or oversights in today’s popular culture. I also love me a good monster. So I brought together some tidbits I’d learned to create a creature tainted by a deep betrayal and deal with a trickster god rooted in Roman history.
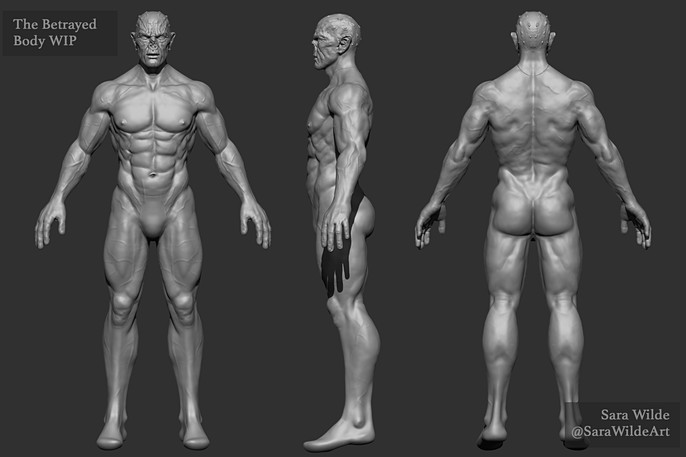
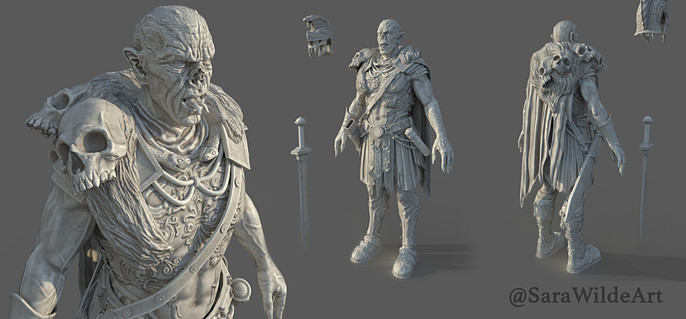
Early modeling/Finding the Form
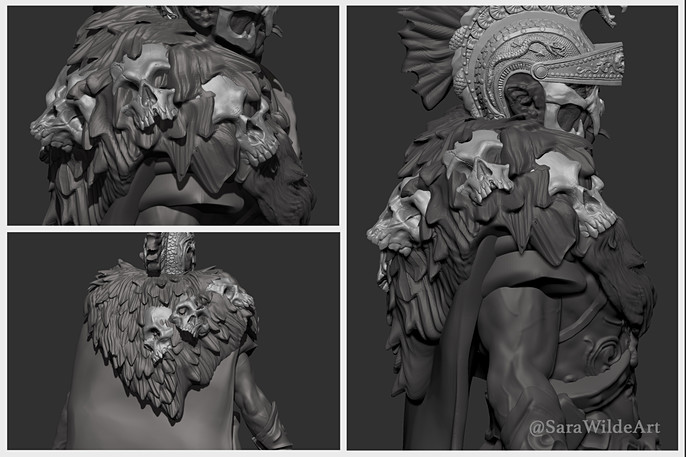
This is the fun stuff, the part where you get to go buck wild with elements and really pull your form out in interesting/weird ways. At this point there is still so much room to adjust your model without losing too many man-hours. If I could give any advice for new sculptors it would be: early in your modeling process keep it loose, keep it quick.
I also made the decision early that I wanted to do everything from scratch. Time constraint wise this was a risky choice, scheduling would be key if I was going to get this whole thing finished in time for the deadline! For my personal projects I want to do everything myself, no base meshes no pre-fab IMM brushes. To me it is important to keep the point of doing a project like this in mind – and the point for me is to improve my modeling skills and push myself as an artist. If I were working at a studio with a heavy deadline I might reuse pieces from our library or use other effective shortcuts.
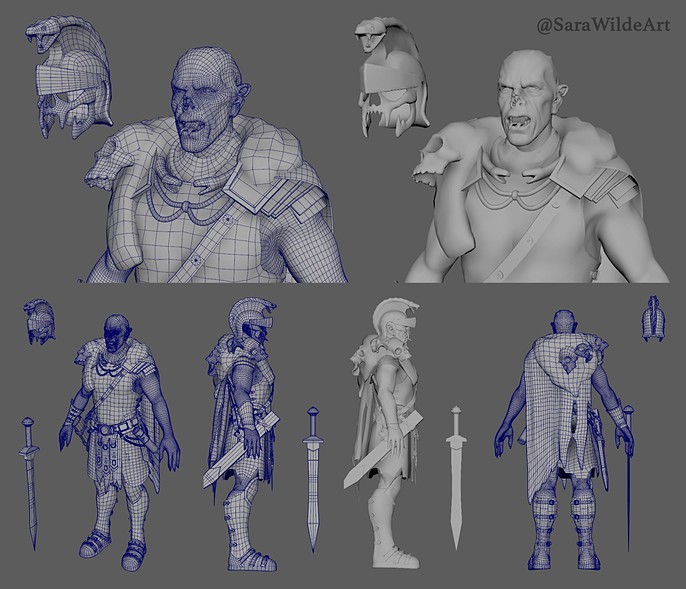
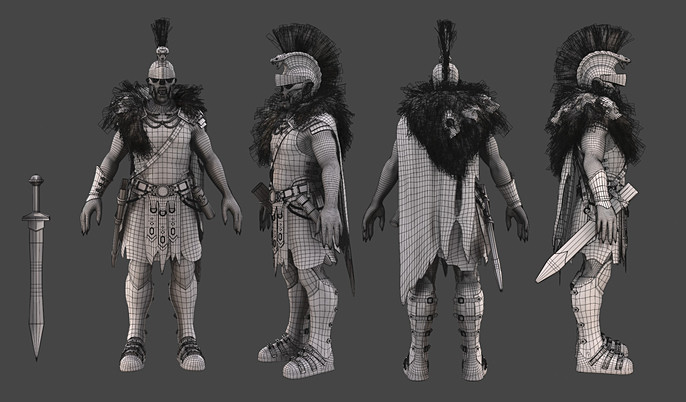
Retopology and UVing
Target polycount is something that I think frustrates a lot of beginner 3D artists. The fact is wherever you go, whatever project you’re working on or system you’re developing for – the polycount needs and constraints can and will change. So for this project I aimed for something closer to a AAA game model but I really didn’t sweat hitting any exact number. Software wise to retopologize the model I used a combination of ZRemesher and Maya. Once I’m finished and happy with the topology I also use Maya for UV unwrapping and laying out my sheets.
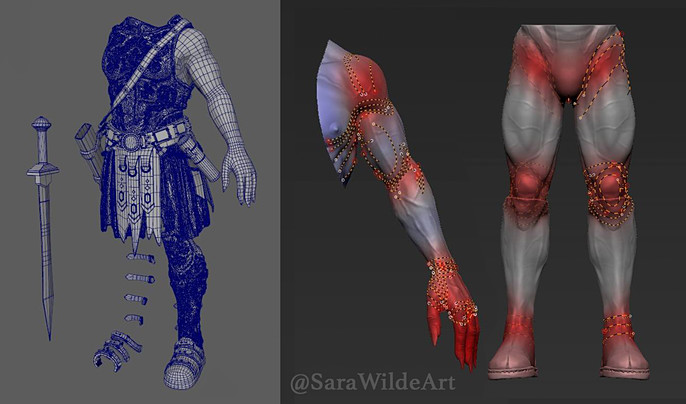
Baking and Texture
I have a great love for Substance Painter, starting out I used to use Photoshop to create all my textures. ZBrush’s polypainting function was my first taste of painting directly on the model, a great feature, but not robust enough for my needs. Substance Painter is incredibly user friendly and full of so many tools and functions that is makes my workflow faster than it ever has been before.
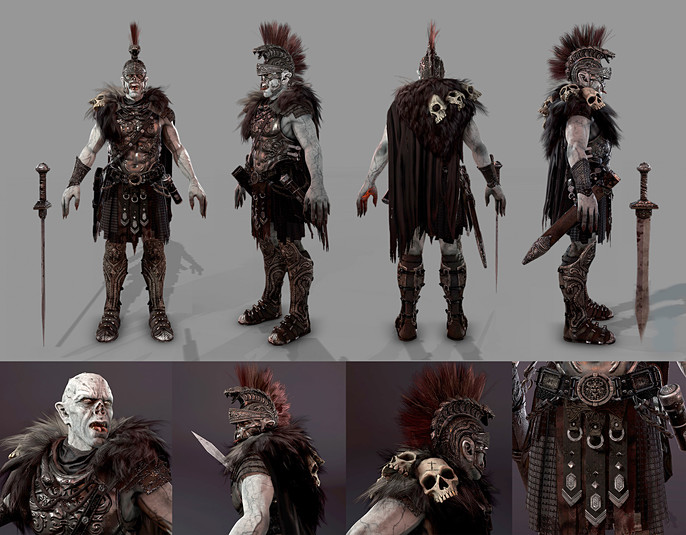
Pose, Light and Render
This is an easy step to overlook until you get down to the wire and it’s one of the most important steps for an artist to get good at! If you can make an incredible piece of work, but you present it poorly, all that talent and time you put into it are not going to shine through. I rendered this model out in Marmoset Toolbag 3, it’s a great program that allows for pretty quick good looking renders. Though I definitely need to follow my own advice here and invest more time into learning lighting and rendering better.
Finishing up this project I was in a big time crunch and staring down some serious burnout from overwork. I had a few fantastic but unexpected opportunities come up I simply couldn’t turn down. So I do feel like I let some aspects of this model suffered specifically: the sword is rushed and too simple, the gauntlet on his arm has texture issues and a few other nit-picky things that I know could be better. In life and in work though we’ll always have deadlines hanging over our heads, so even with my own impossible standards I still feel proud I was able to finish this piece off and get him in on time with everything else going on.
The End!
This model took me about a month and a half or roughly 160 hours to complete from research and concept stage to final renders and forum posting. I learned a lot from the process and would encourage anyone else out there who is struggling with self-motivation to join in a contest like the CubeBrush's Art War and really push yourself to finish a project!
Happy modeling!
Follow Sara on Twitter, Instagram and Facebook
Check out her site here.