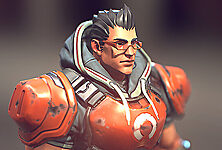
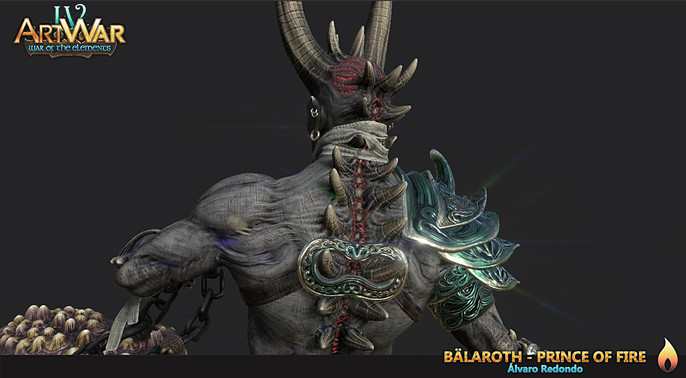
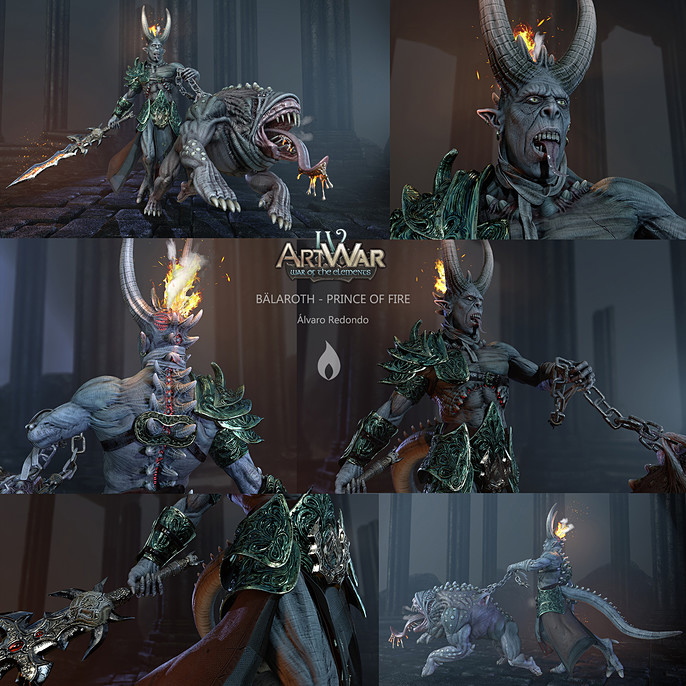
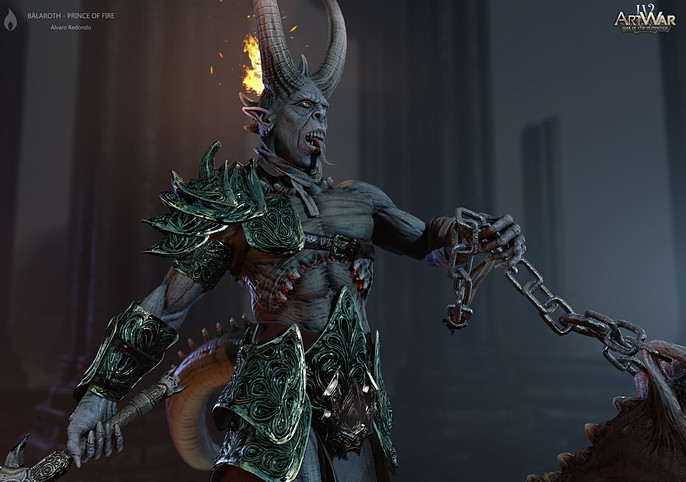
The Making of Art War 4 3D Finalist: Bälaroth - Prince of Fire
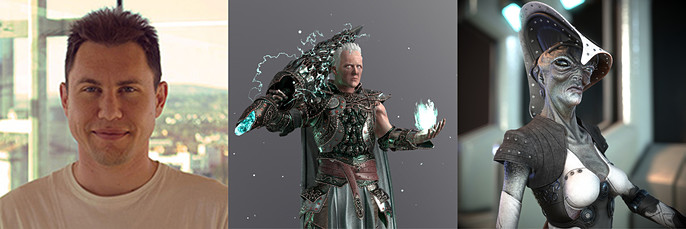
Álvaro Redondo is a self-taught 3D artist from Murcia with 20 years of experience. He has collaborated on very diverse projects, although in recent years he has been focusing on 3D art as a freelance. He's worked on projects such as being a senior 3D modeler in the post-production of the third season of Netflix’s Money Heist. He also teaches character design and modeling at ESI Murcia.
Reason to Participate in Art War 4
Last year I tried tried to focus even more on character art, so on the first day of 2020 I decided to join Art War to start the year well and add another new piece to my portfolio as well as measure and improve my skills. I like to take advantage of every challenge to improve and try new techniques. On this occasion, I wanted to try to make a fantasy character and I had to do it in a month alone in my free time.
The theme of this edition allowed to be quite creative to become a hero of one of the four elementary factions proposed. This is something that motivated me a lot to join Art War 4.
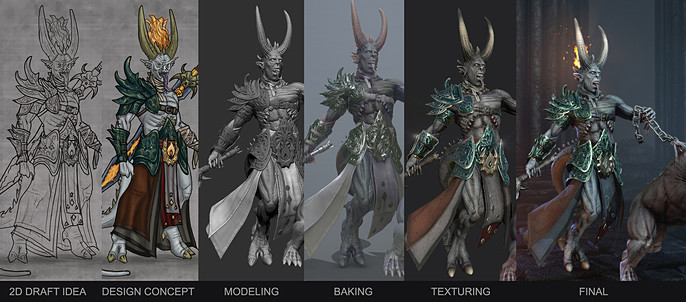
In this article I will describe the process I did to create Bälaroth - Prince of Fire.
Idea and Preproduction
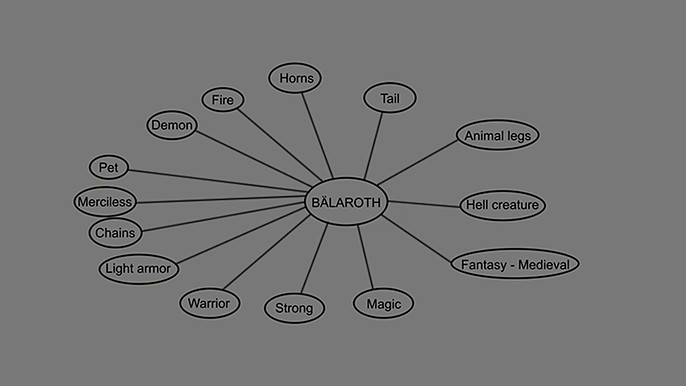
For some time I wanted to make a creature and I liked very much the idea of doing a demon from the fire faction.
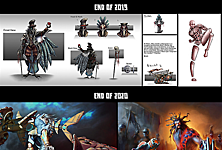
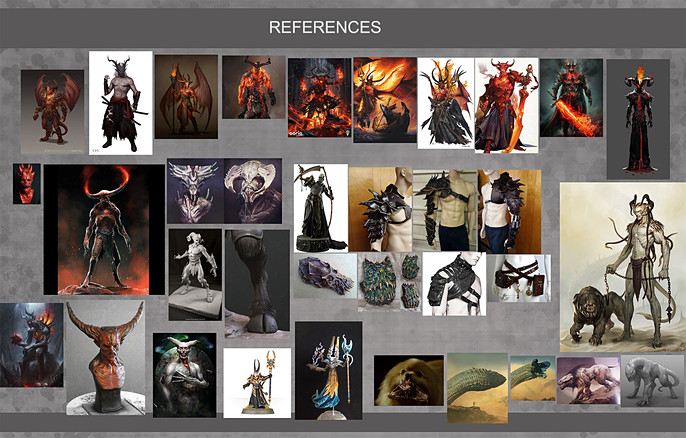
The next step was to think about the rest of the key elements that defined the character and I looked for references that covered those terms.
In these references you can see where I took the ideas for the pieces of armor and clothing, the demon style or even the jaws of the pet.
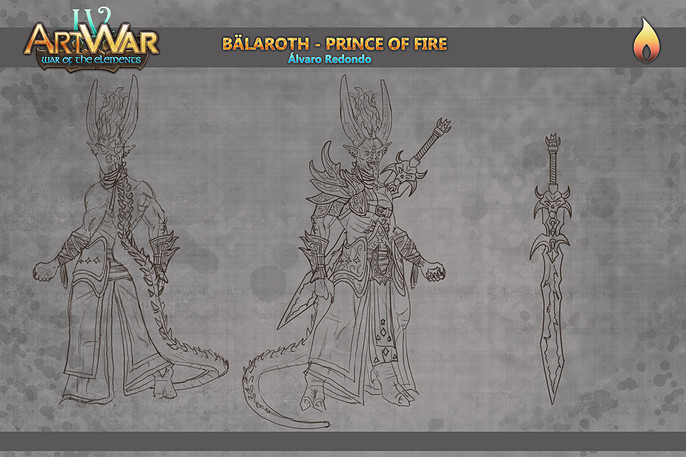
Concept art:
Although I had the idea quite clear, I wanted to make a quick concept art to visualize it. This is something that helps a lot in the production process, since I don't have to stop to think about the design while I’m modeling.
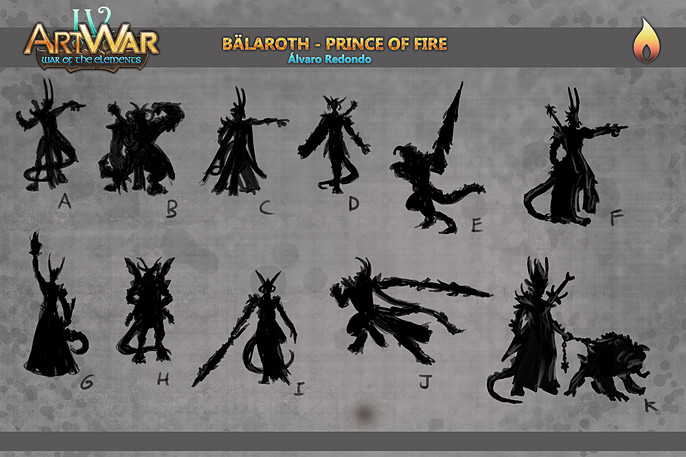
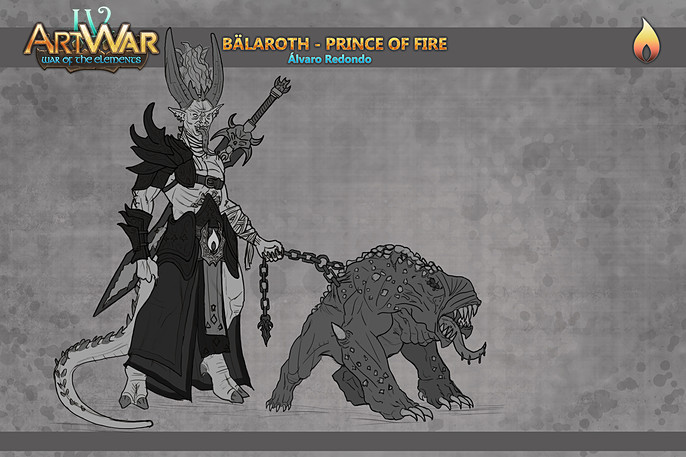
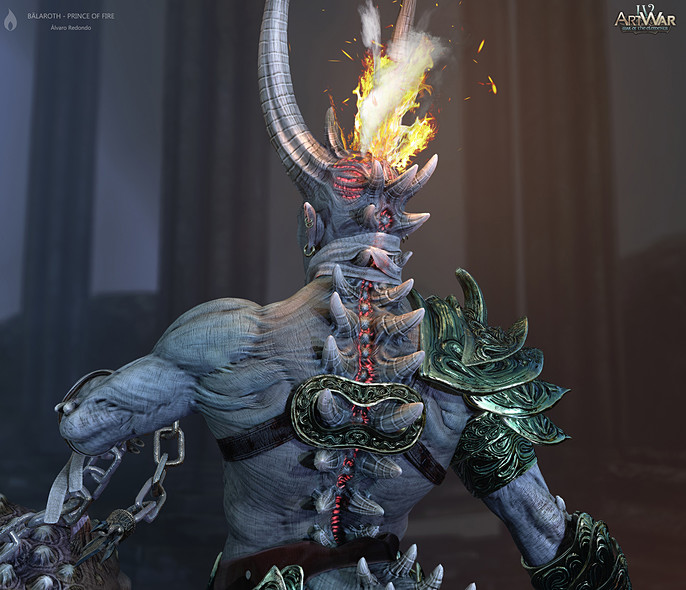
I started with some silhouettes that I quickly defined in a sketch of what Bälaroth could be. Since he was a prince, I wanted him to have a very ornate and colorful armor, and that flames crowned his head to reinforce his personality. The fierce pet would complement the character.

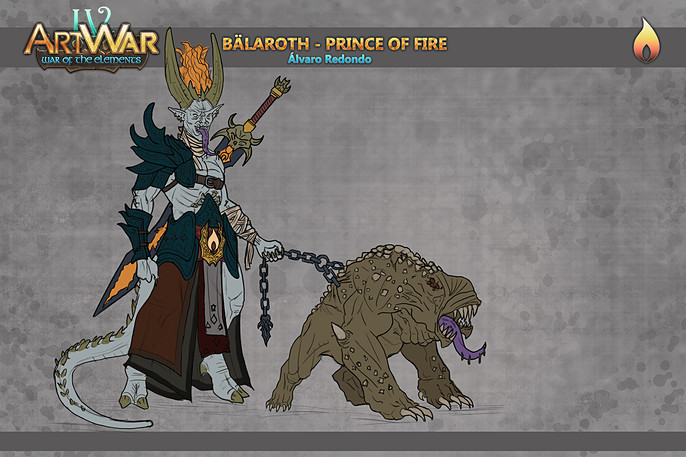
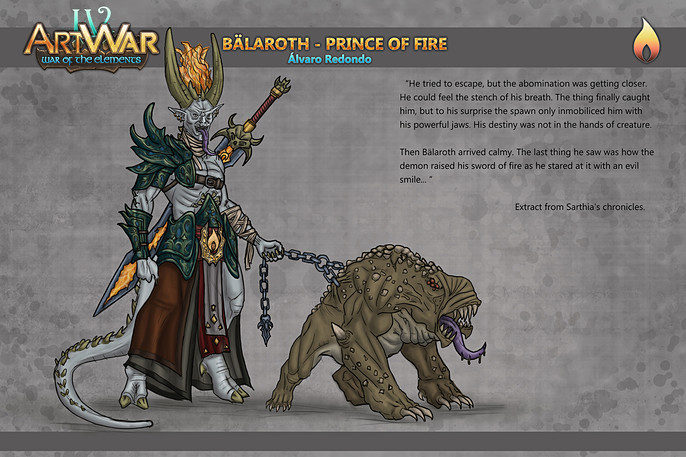
Finally, I added some basic colors to the concept art at the same time, I also thought of some small text that would accompany the character to get into the mood. With this I had my idea completely clear and defined to go to production.
Base mesh:
I began to model the body of the character in Zbrush through simple primitives such as spheres and cylinders from which I was giving the proportions with the “Move”, “Standard” and “ClayBuildup” brushes.
Then through masks and extractions I created the base meshes of the rest of the elements.

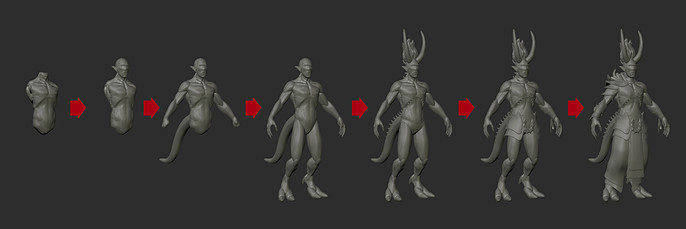
This way I could see if the concept of the character worked as volumes.
From here I would only have to work on the details of each of the subtools.
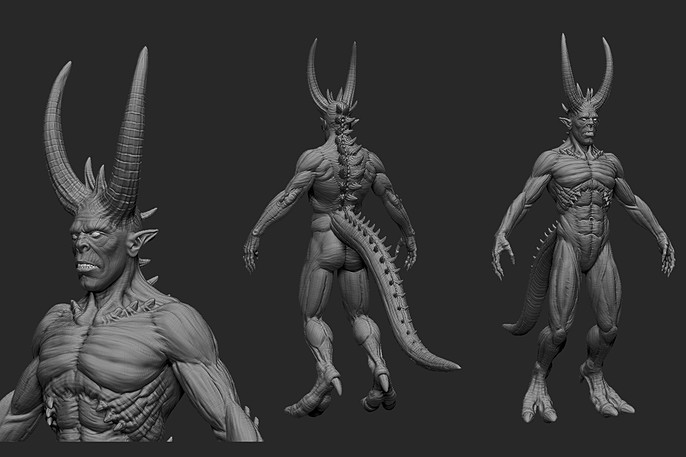
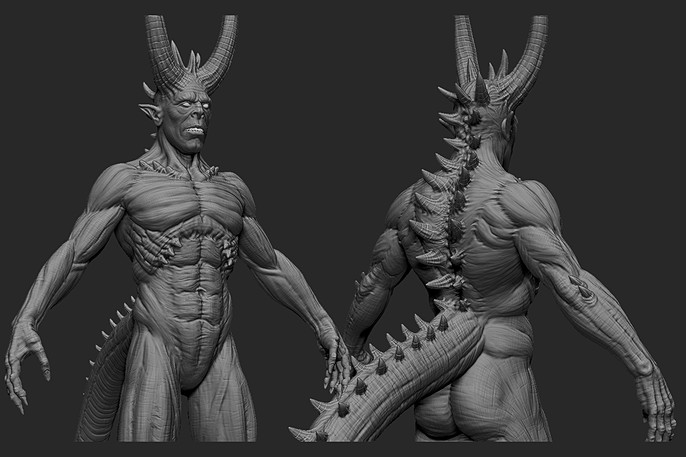
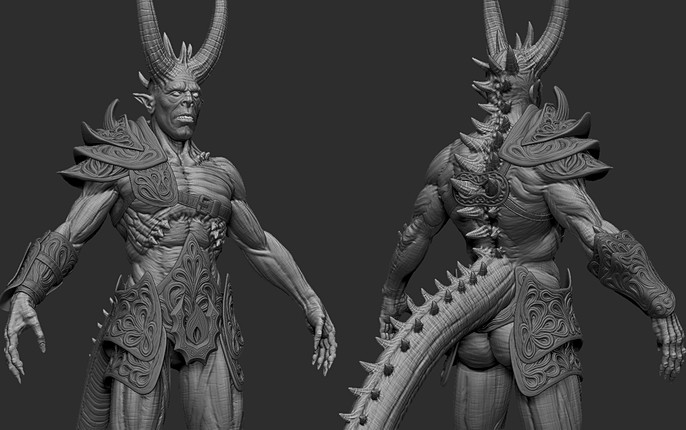
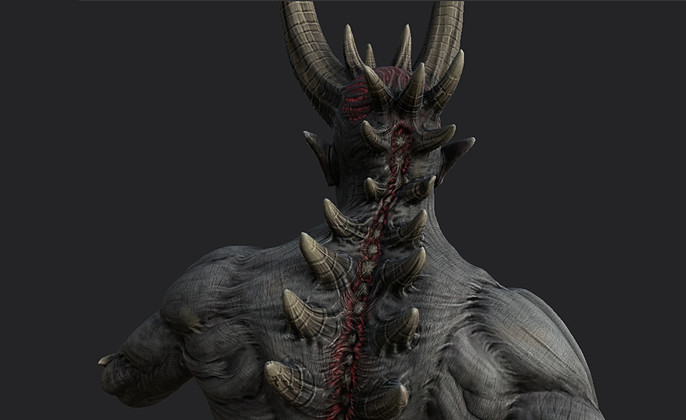
Body sculpting:
I started working on the primary and secondary forms of the face and body muscles using Dinamesh and symmetry. Again I used the “Move”, “Standard” and “ClayBuildup” brushes. To these I added “DamStandar”.
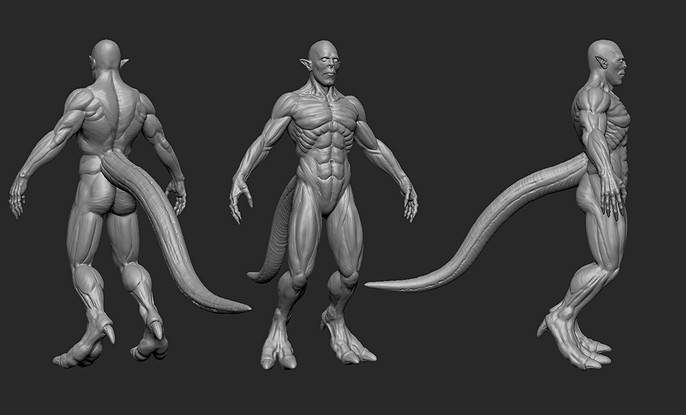
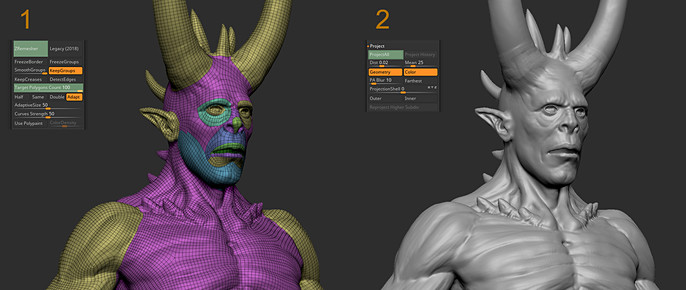
Then I performed a quick retopology using Zremesher and guides in areas such as the face, where I was interested in having a good topology that would make it easier for me to make the character's expression. This topology would serve for the final presentation, since there was no limitation of polygons. I projected the detail dividing the geometry, therefore, the model was ready to give another detail pass through subdivisions.
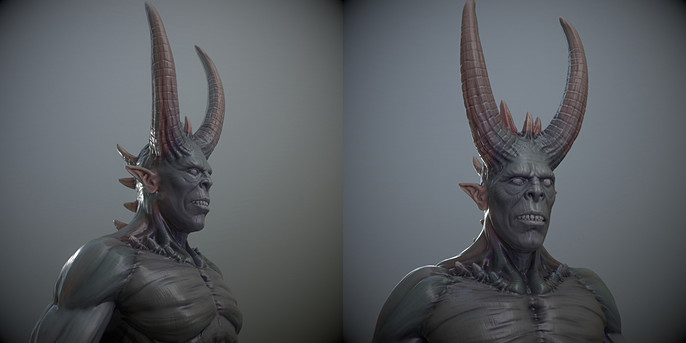
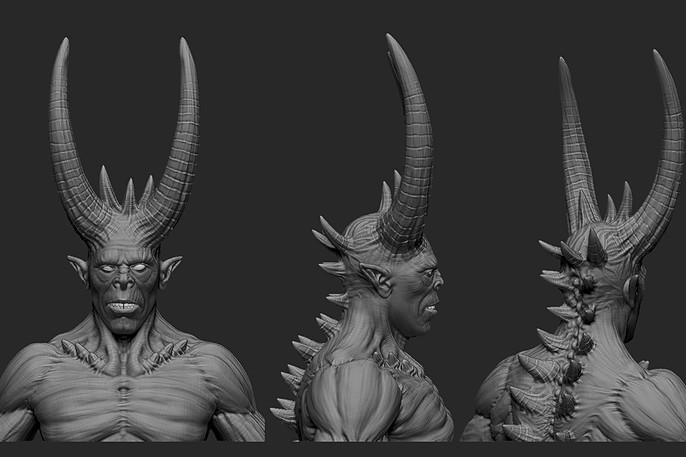
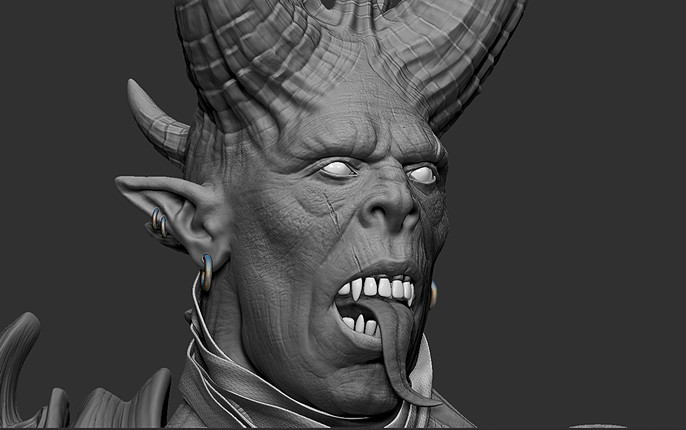
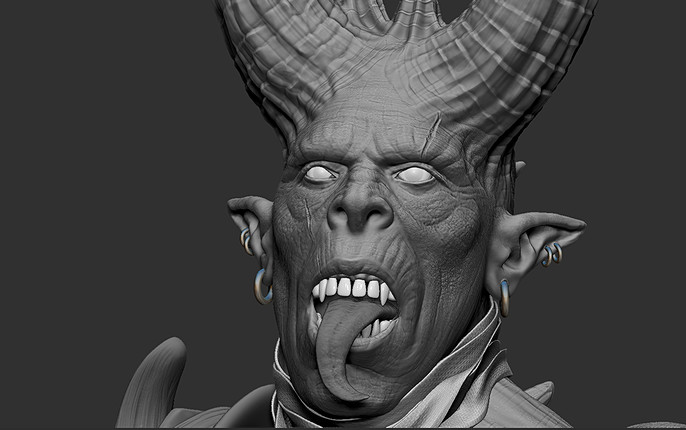
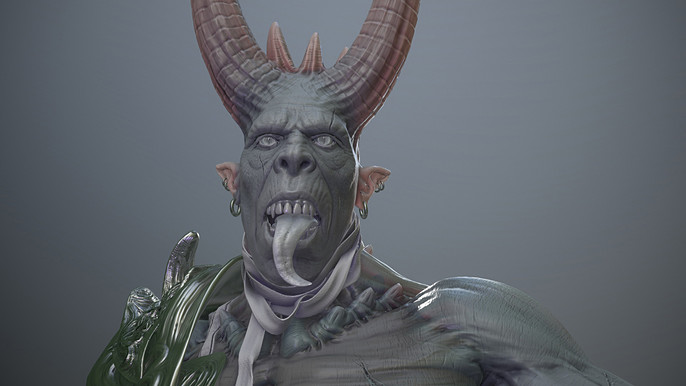
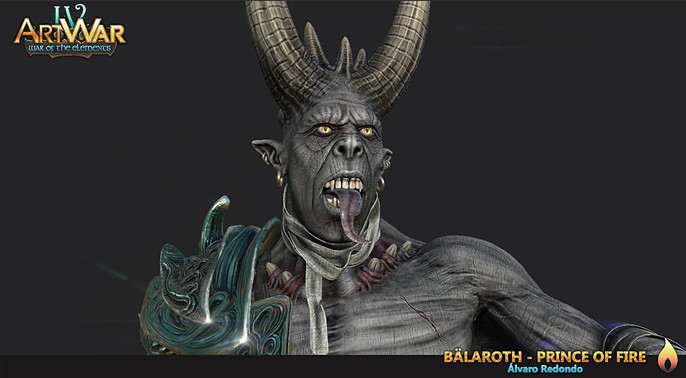
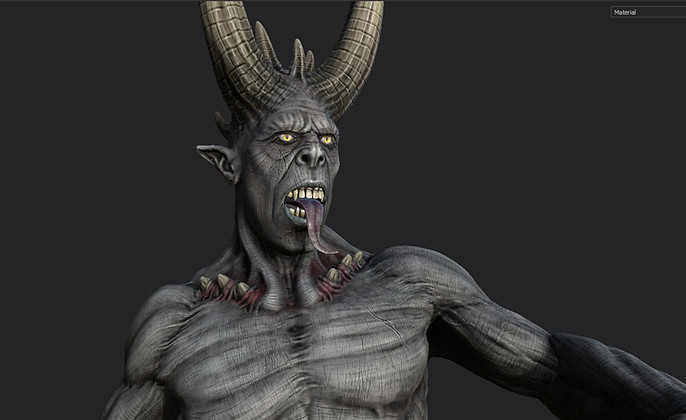
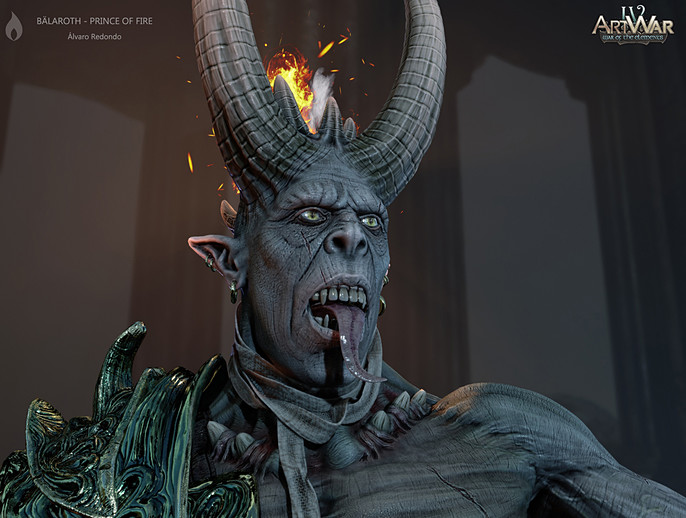
In the next stage I started working mainly on the face of the character, because it is one of the most important parts. I focused on giving more details and asymmetry with same brushes, in addition to adding the elements inside the mouth through new subtools.

With this version I did a quick test to see how the details would look with a basic lighting and material in Marmoset Toolbag.
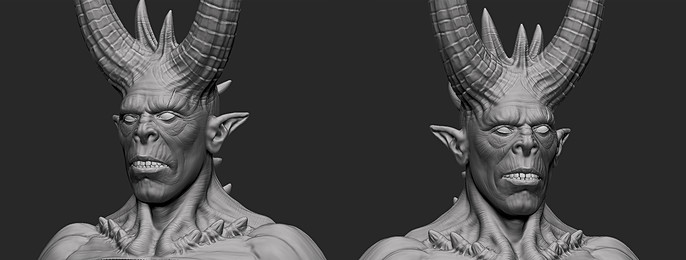
The next thing I did was to match the level of detail in the rest of the body using the same techniques and brushes.
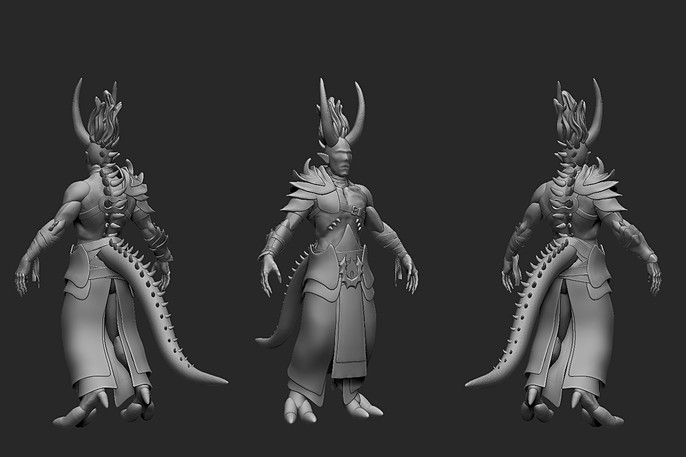
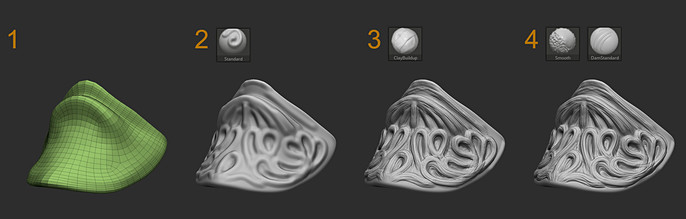
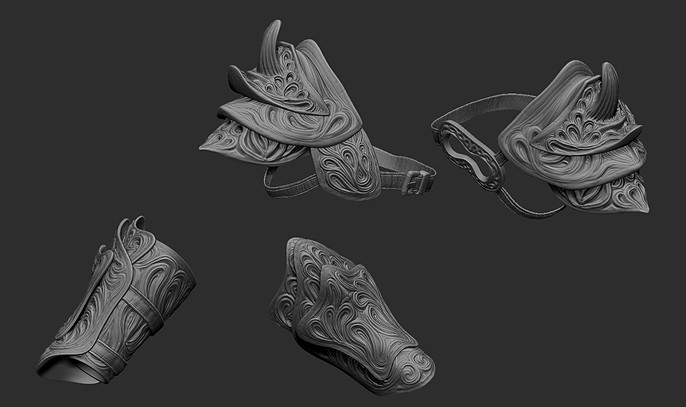
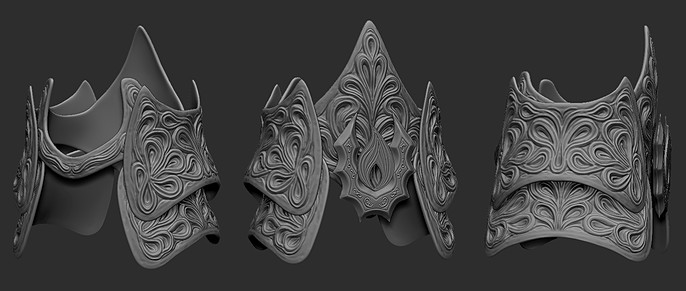
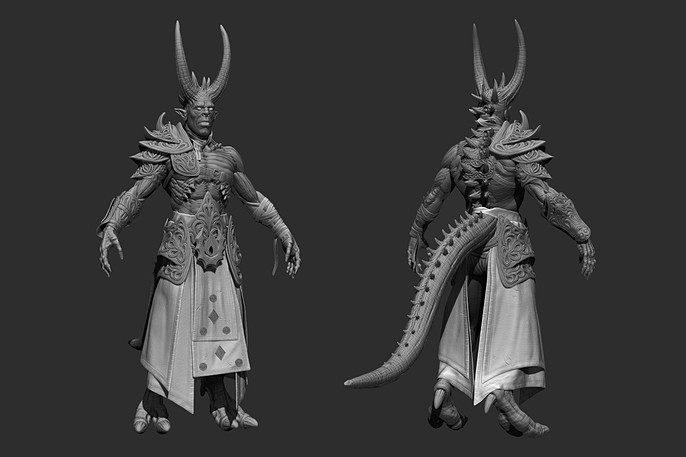
Armor.
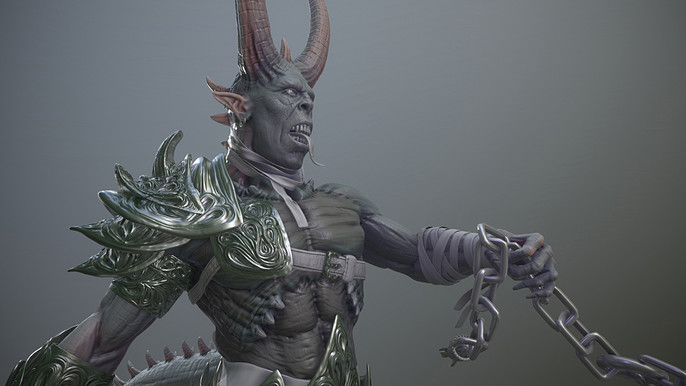
Next I began to give details were the armor plates. Each plate was created from the body with the subtool / extract option. Then I applied a zemesher and polish to it. The basic shapes were defined with the move brush and symmetry. I added divisions and the details were made by hand with a mixture of standard, claybuildup and damstandar brushes. The straps followed the same process in addition to an alpha to create the details of the seams.
Cloth:
The base of the cloth pieces were created in Marvelous Designer.

Then it was imported into Zbrush where it was finished adjusting and defining details. Finally, a repeatable alpha was applied using masks and the Noiseplug. The seams were created in the same way as in the armor straps, and the broken ones with XMD brushes.
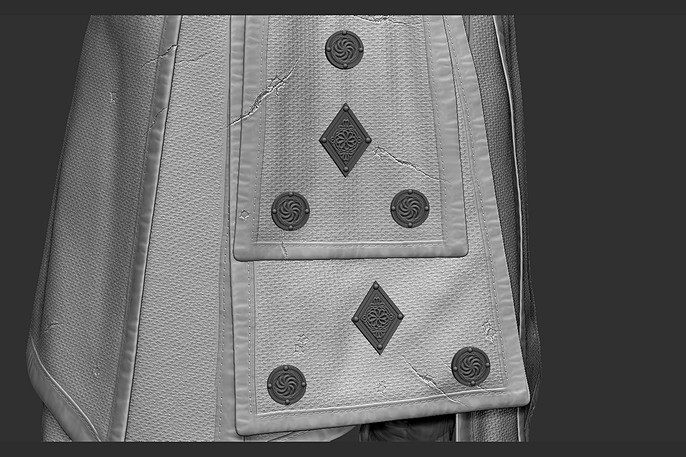
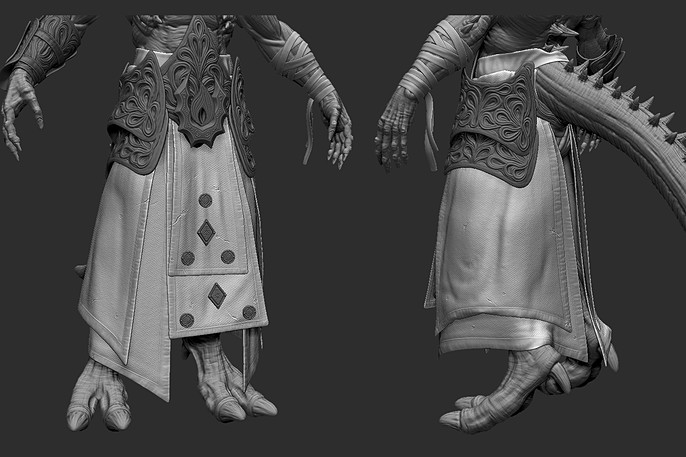
Other details:
I made the rest of the details like the fire symbol and some ornaments following the same steps I did with the armor. I also decided to remove the extra straps that covered the front of the belt, because they covered all the detail of that plate

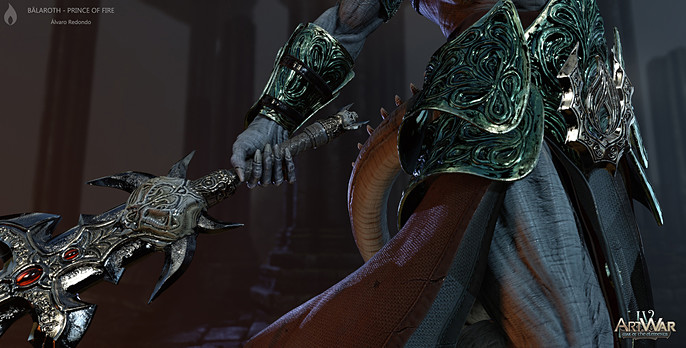
Sword:
The next accessory I made was the sword that the character carries. Here there is nothing specially new in the process, which is the same as with the armor and clothing. Hard work by hand and use the same brushes as until now.
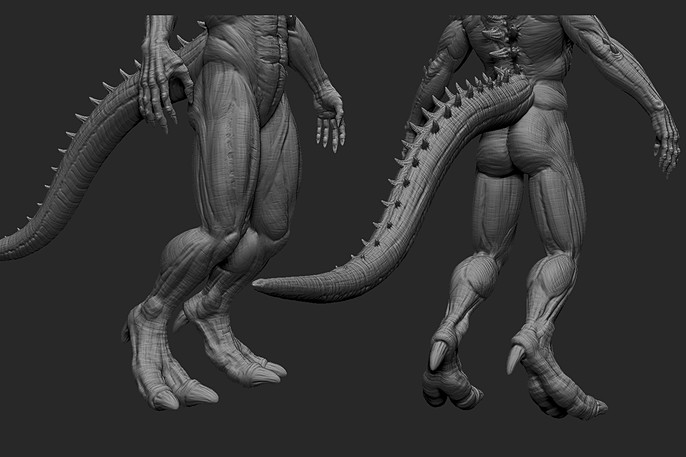
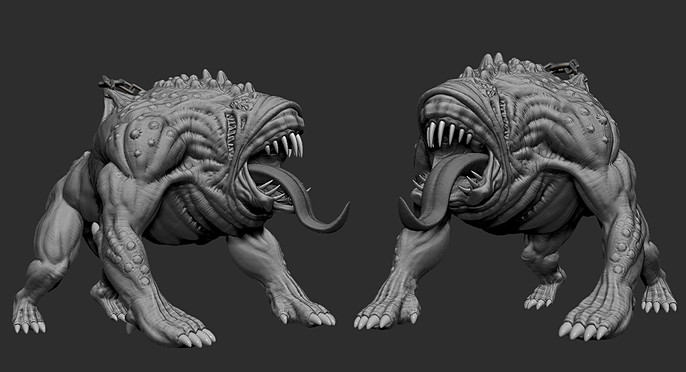
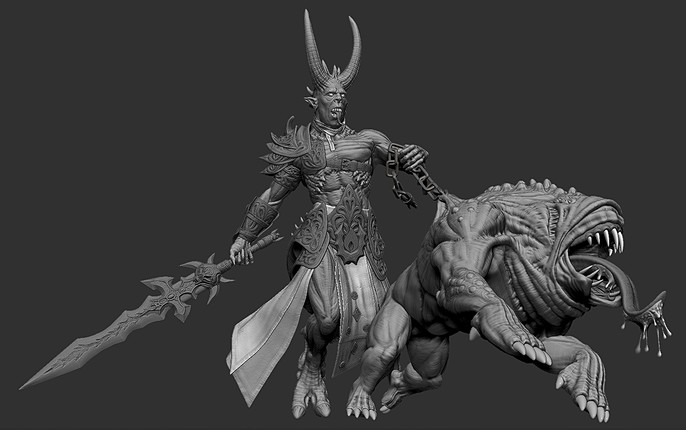
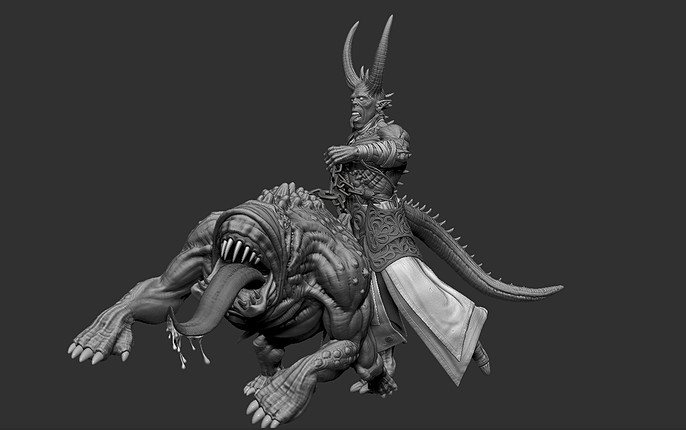
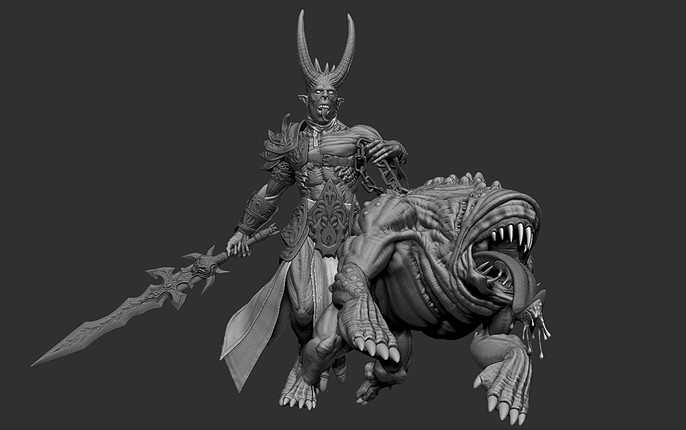
Pet:
The pet's block was made by reusing the character's base. It was given the form until leaving the proportions that the concept shows.
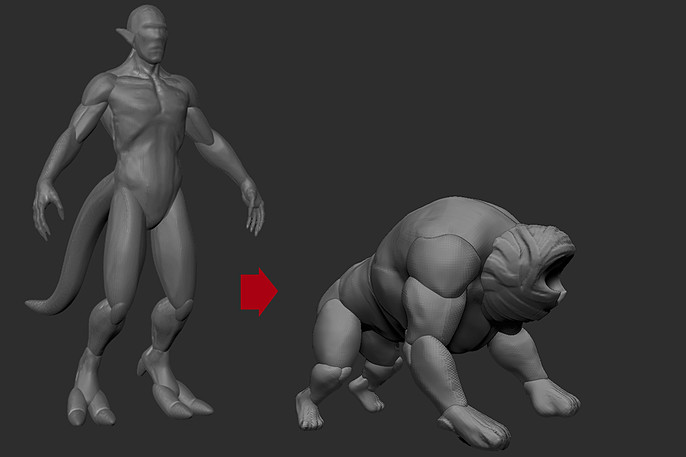
The rest of the elements such as tongue, teeth and nails were made using simple primitives that were shaped. Then the same stages were followed as with the body of the character to add the rest of the details. The move, standar, caybuidup, damstandar brushes were also used.
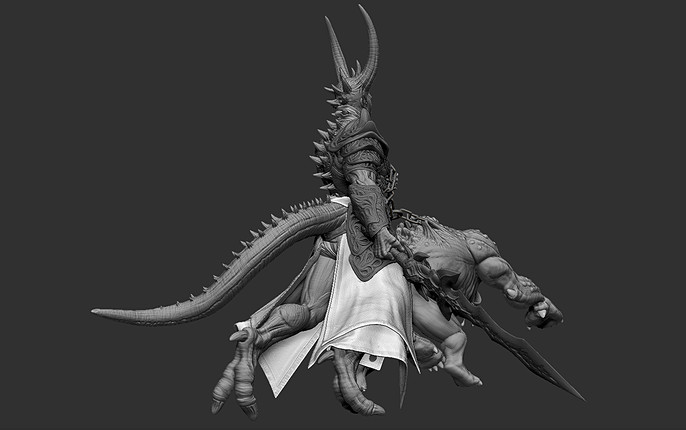
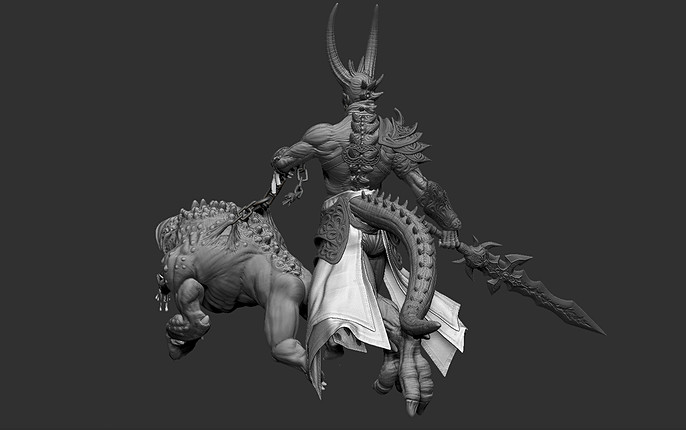
Pose:
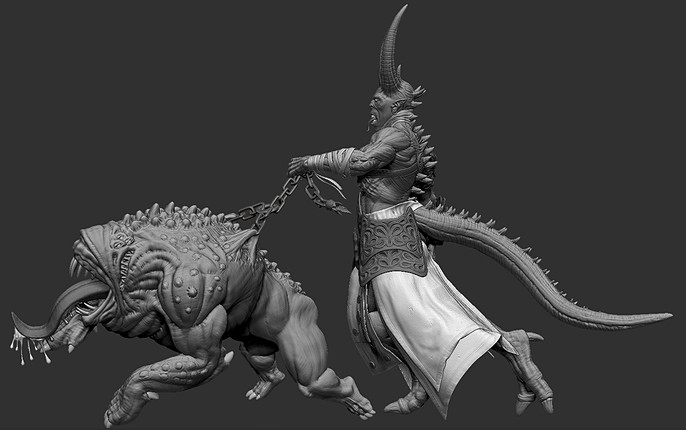
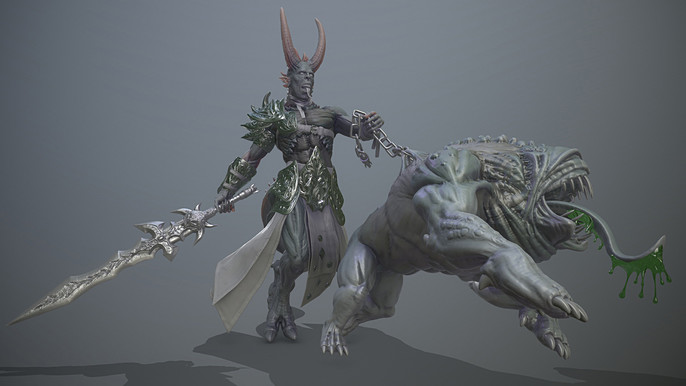
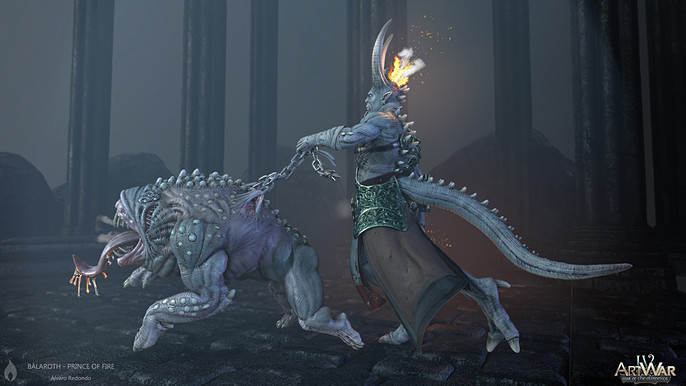
With this I already had the character and all its accessories ready. I usually take out the uv and paint the character in a neutral pose, but here I decided to pose the character before and paint it as if it were a collectible miniature, to remember one of my old hobbies.
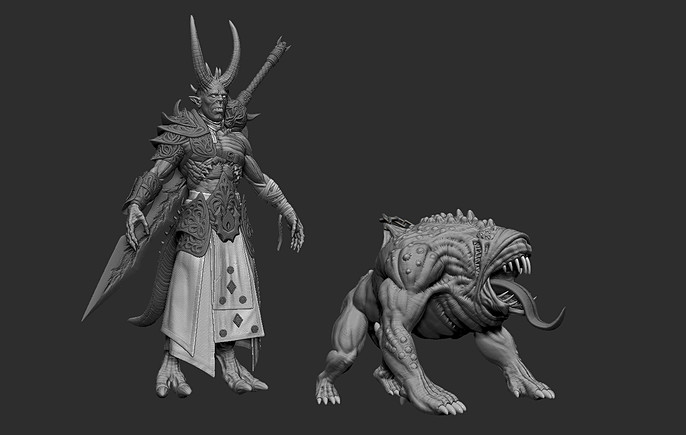
To pose the character I used Subtool Master, Transpose and the move brush with the help of masks, until I found an interesting pose seen from several angles in which the pet was pulling and trying to jump on someone, while the character accompanies and carries the sword ready to hit from below. I also worked the expression to follow the concept art. As the character was not going to be animated, I gave a new pass of detail throughout the body of the character and the pet.

Texture Baking and Painting.
As there was no restriction of polygon or textures, I decided to use the lowest level of divisions of the different pieces of the character, in what could be a midpoly version. The UV was performed in Maya and the baking process in Marmoset Toolbag, using the option of groups to avoid passing the detail from one part to another. I carried out this process in different sets of elements to avoid overloading the computer.
Once the maps were obtained, I passed the model to Substance Painter where I followed the color scheme of the concept art. There is nothing special here and the model was very grateful to paint thanks to all the detailed information that the control maps had. It really felt like painting a collectible miniature, from a series of passes in different layers with variations of tones and the use of mixed ambient occlusion and curvature maps or as masks.

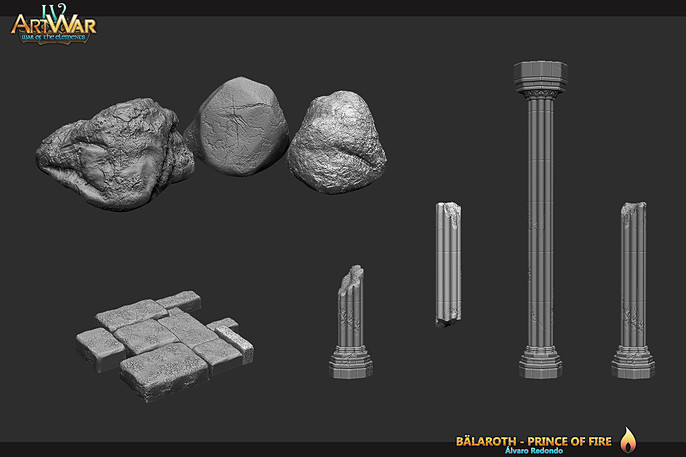
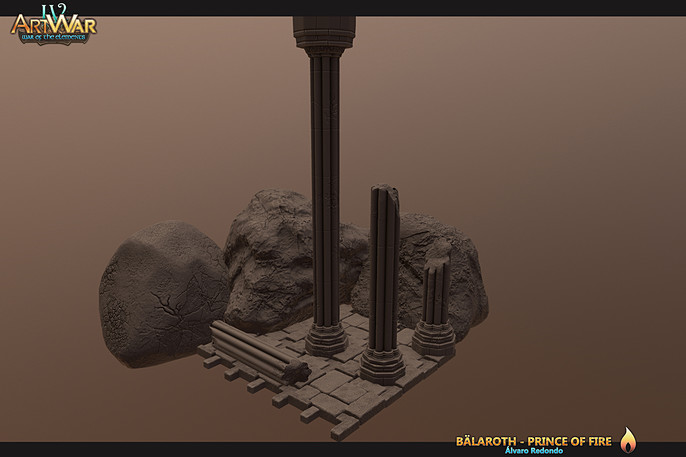
Environment:
At this point, there was very little time left for the deadline, but I did not want to present the character with an empty background. I decided to sculpt a few decorative elements in a modular way that would allow me to combine them and create a small environment for my final presentation. The process of modeling, texture baking and texturing is the same as for the character.
Materials, lighting and final touches:
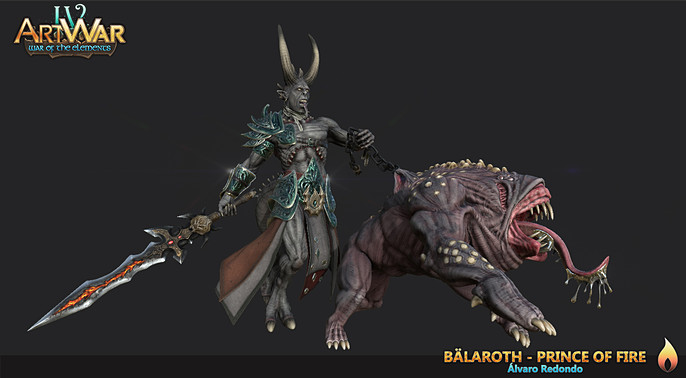
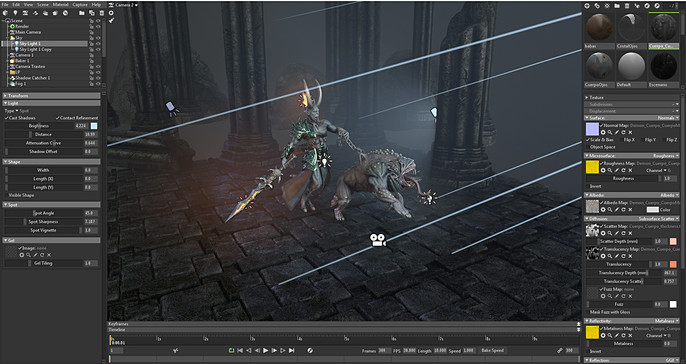
I decided to make the final presentation in Marmoset Toolbag, for its ease of configuration.
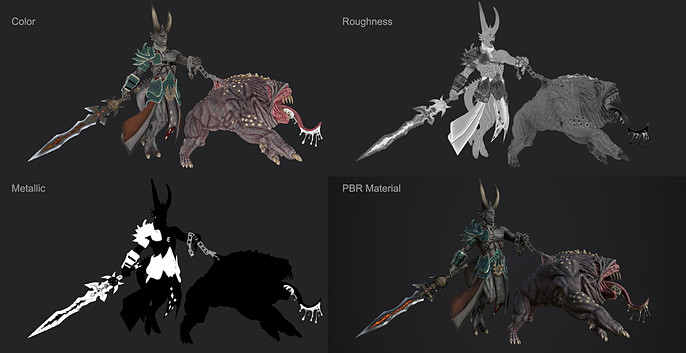
For skin and fabric materials I used metallic / roughness configuration with subsurface scattering to which I added their maps created from existing textures. For the effects of fire of the sword and character’s back I used emissives.
The hair and sparks were subsequently added using plane meshes created in Maya and material with transparency and emission textures.
With all this I established a point of view that would take advantage of the character's warm points to guide the view of the observer and placed the elements of the background.
The lighting was made from a skybox, a directional light and a series of spot and omni lights to highlight or profile the different parts of the character.
Finally, volumetric effects and depth blur were added.
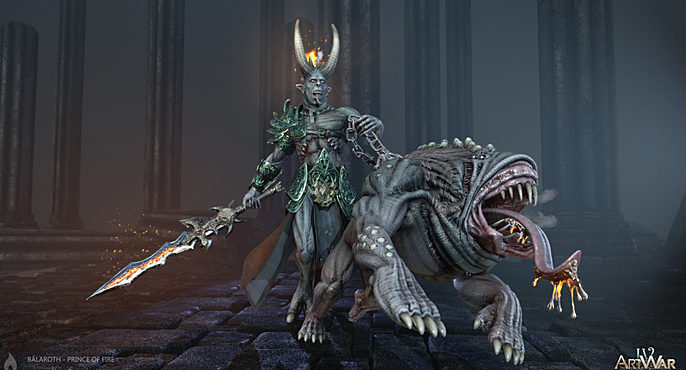
And this is the final result:

Summary:
In summary, I am happy to have achieved this result in such a limited time (one month during my spare time).
It is the first time that I participate in this challenge, but I have had fun and learned a lot and this is already an excellent award for me.
I have also been able to appreciate the great work of the other participants and meet some of the members of this excellent community, to whom I am very grateful for their comments and feedback.
I hope to be present in the next edition.
Thank you for your time and read this break down article.
See more of Alvaro's work here: