The Making of Kira- 3D Art War 3 Winner
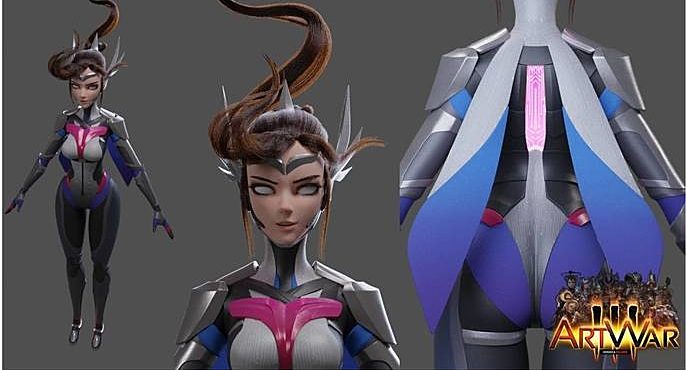
3D Art War 3 champion, Jason Chan, takes us through the step by step process of creating his winning submission- Kira. Check out Jason's interview here.
Concept
I always start off with a rough sketch when I do my work in 3D. It doesn’t matter if it looks terrible, it's is fine as long as I understand what I am doing. I originally had the idea of creating a futuristic Valkyrie/elf, giving her the ability to use multiple weapons and extra holographic arms. I often times come back to sketch some more, if I have any doubts about my design in 3D.

References
Then came the fun part where I search for references to fill the gap of my bad drawings. I search for images that conveyed the same emotion of my sketched character. A screenshot of all the gathered references was taken and turned into a desktop wallpaper so that I had a clear idea of what to do whenever I start my computer.

Modeling
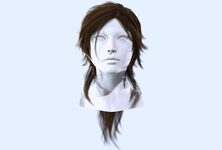
Everything that I do at the start is very rough. Since I was using a mouse, smoothing out vertices was a process. I knew that she would be wearing armour, so the polygons of the body were generally placed. In other words, the body has been just there to be a place holder for the armour.
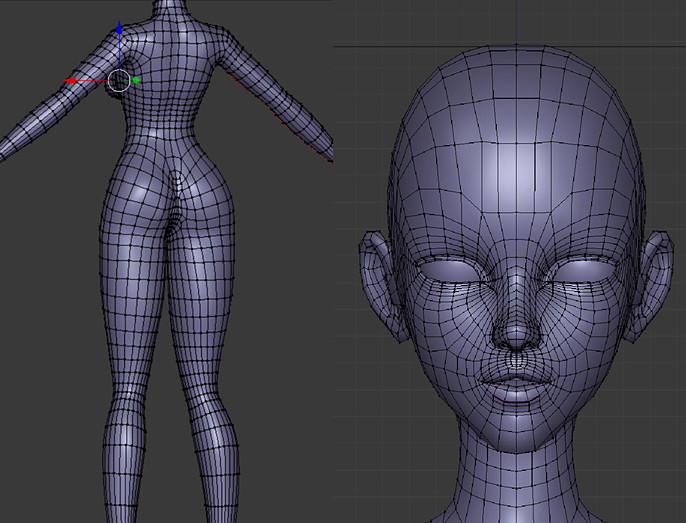
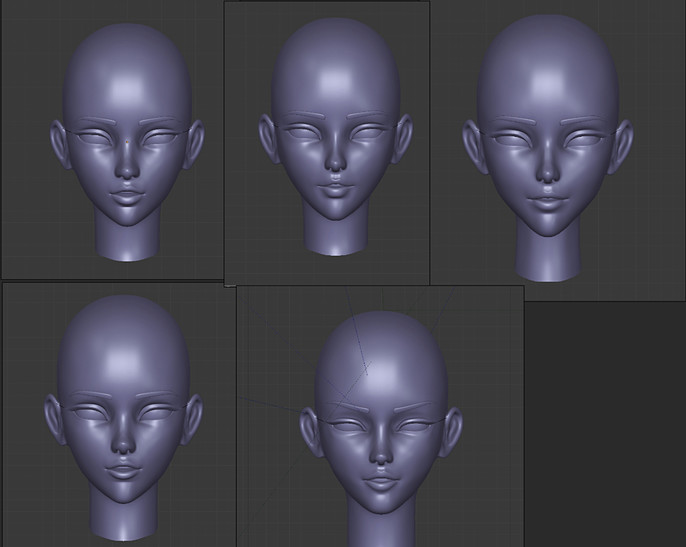
People jump right onto the face when they look at a character. I paid a lot of attention to the shape of the face, making different versions of it in different layers, so that I can decide on which one to use. Since everything was modeled by polygons, retopology was not needed.
After having the head and body puzzled together, came the part where I drew over the 3D model using my tablet to see what it would look like if it was finished. Again, very rough. I was trying to go experimental and used the new Blender grease pencil tool to generate 3D shapes using the pencil lines. It did not really work for me. Using the new random Matcap shading, Blender helped me to separate the character into more readable shapes.
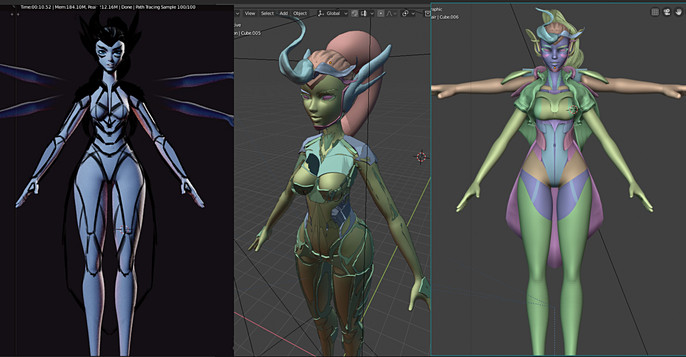
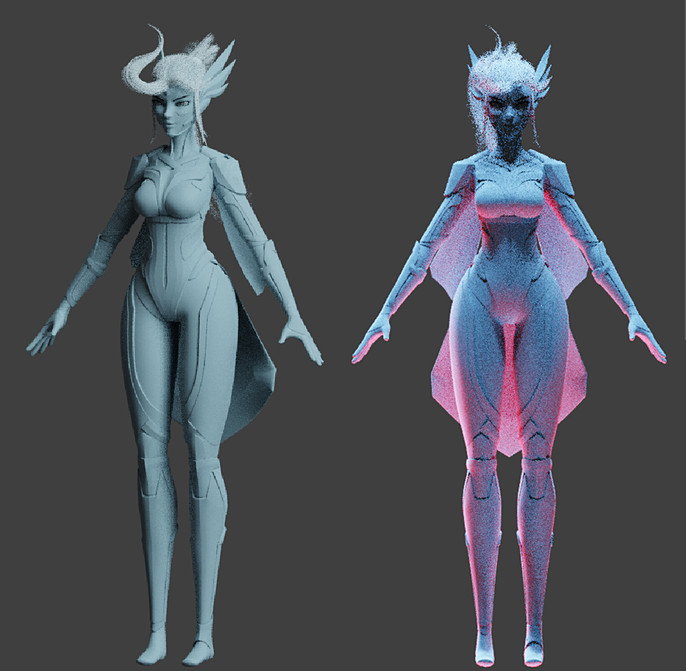
I removed the waist cape to give the character a better silhouette and gave her wing like scabbards.

Colors
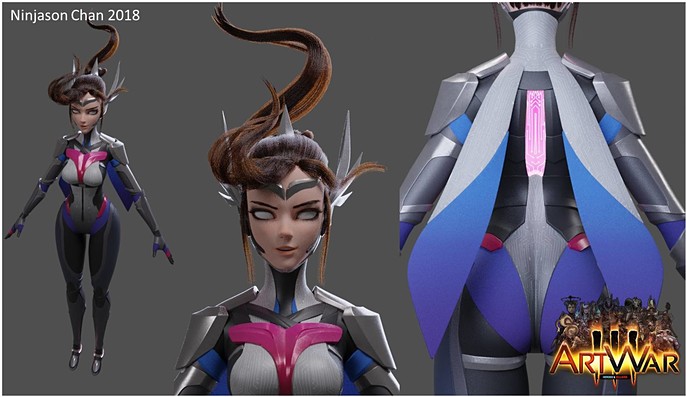
Deciding on what color to give Kira was a long process. Good advice is to check if your character colors are unique by either asking a friend or searching it online. You don’t want your character to be reminded of some other existing character. In my case, the original color scheme made Kira look a lot like D.VA from Overwatch, which was not what I intended.
I made her chest piece a different color, so that it acts as a centre piece to make her more unforgettable.
Posing
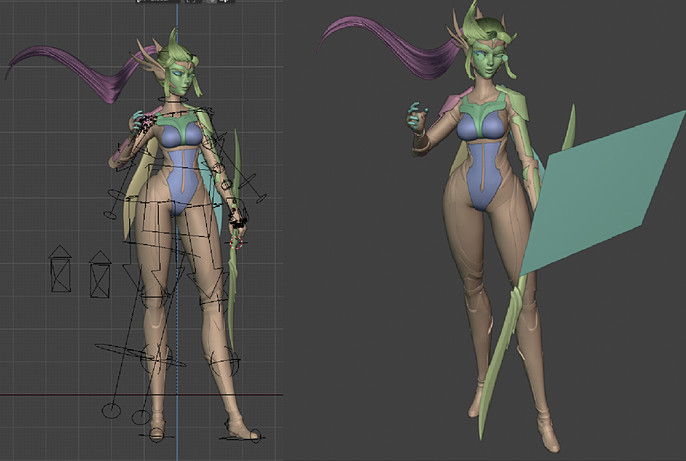
I used myself as reference for the pose of the character, just to understand how the anatomy would work.
I love the concept of multiple uses for a weapon, just like how they have it in Final Fantasy. So the idea was to have a bow combined from dual swords, but the result was a bit pointless and did not provide a clear narrative to the character’s body. The arrow also drew attention away from her face, so her ability had to change due to posing issues.
Lighting
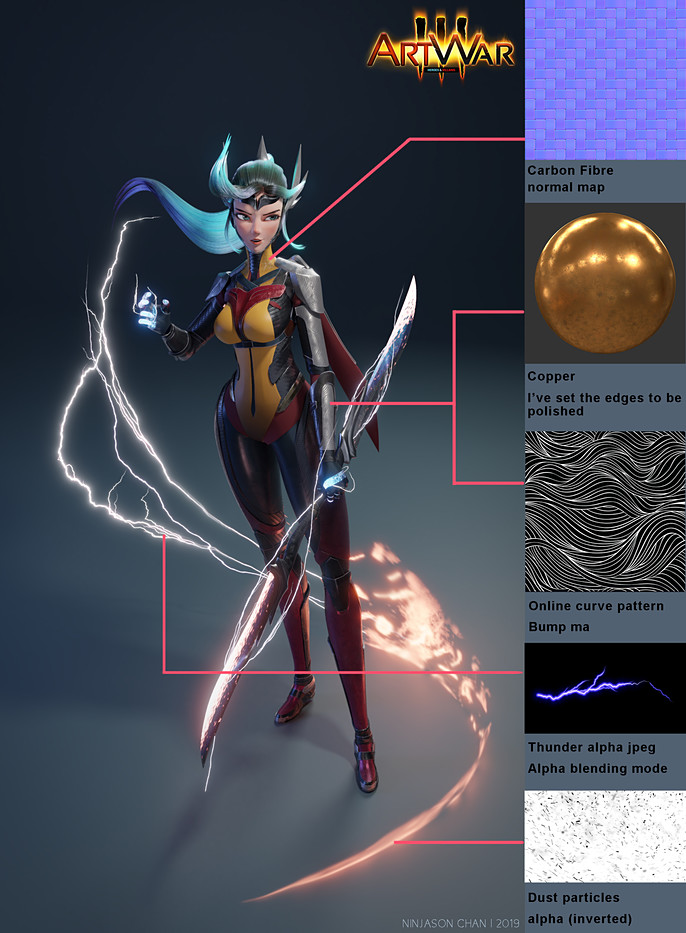
After giving her a new pose and a new weapon combination concept (dual swords to a spear), I focused on the lighting. Giving her a simple three point lighting setup, with a strong warm key light, soft cold fill light and a white backlight. I placed emission planes in front of her eyes for reflection and a default plane just to give some diffused reflection to her body. Like how photographers would have done it in real life.
Texturing
I love having gradients in my materials. The electric power on her hands and spear blades are procedural materials that I have made myself. Copper metal and carbon fibre materials came from poliigon.com, while the others were straight from google images.
Final
At the end, the rendering time for one image took around 45 minutes with my Nvidia GTX 1050, Intel Core i3-8100 PC. After a few color adjustments using Photoshop, my images were good to go.
This has been a challenging yet fun process. I sure have learned a lot along the way, not just by myself, but also by observing other fellow contestants.
Thank you reading the first tutorial that I have made. I hope you have learned something from my process!!!