The Fearless German BBQ Hero
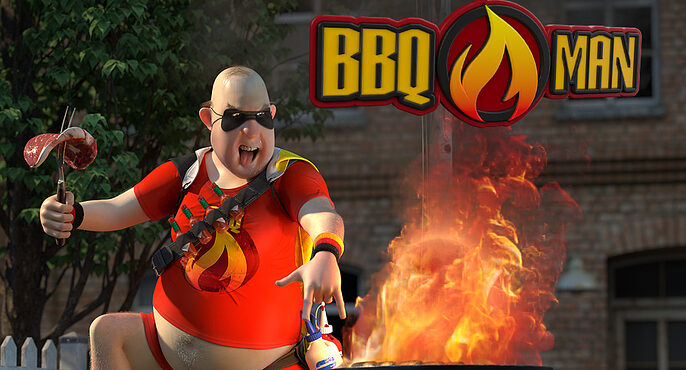
Martin Rau is a Germany-based 2D- and 3D-Generalist, Motion Designer, Art Director, and Creative Director working for the advertising industry for over 25 years as a freelancer.
Being a complete autodidact, he is always interested in exploring new tools and techniques that help to push aesthetics and storytelling, while continuously grinding for new inspirations from every available source.
Here is how he managed to create his “Fearless German BBQ Hero” a.k.a. “BBQ-Man."
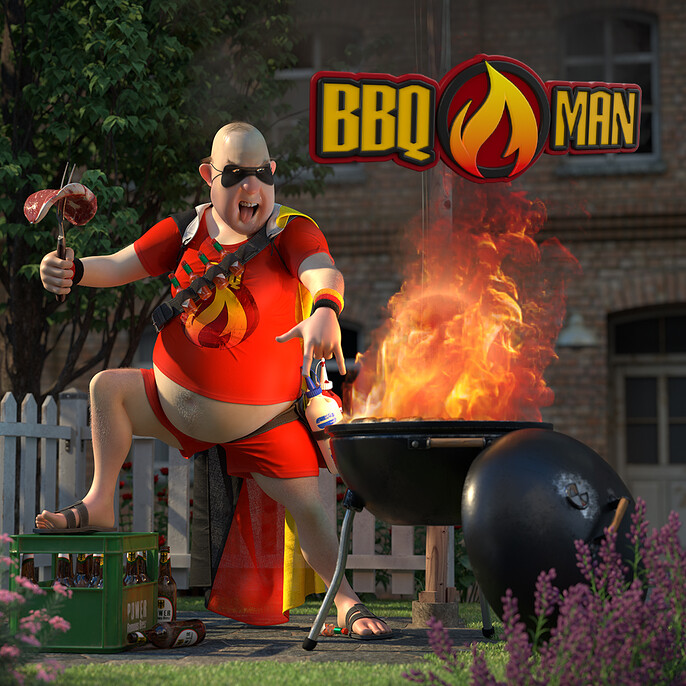
Concept
Fortunately, I did notice the start of this new challenge very early, right before Christmas 2020. After reading the brief and having a look at the finalists of Art War IV, I got hooked and came up with a rough idea for a final piece pretty fast.
Without any doubt, creating another stereotypical superhero or fantasy fighter was not an option for me.
As mentioned in the main blog of my entry, I am living vegan, and watching people carrying loads of cheap meat out of the German supermarkets during BBQ season is quite annoying for me. Besides that, I tend to be pretty ironic with my statements. This led me directly to the vision of an overweighted and sweaty homemade BBQ “hero” in front of his beloved kettle grill and a flag pole in the front yard with the typically involved beer crate.
Because it was important to me to not get too personal with this piece, I decided to stay more on the cartoony side. And since the vision of the final piece was pretty clear at this point, I skipped the sketching part and started doodling in 3D right away–at least for borrowing some extra time to eventually overcome unexpected difficulties during the creation process and for final tweaks.
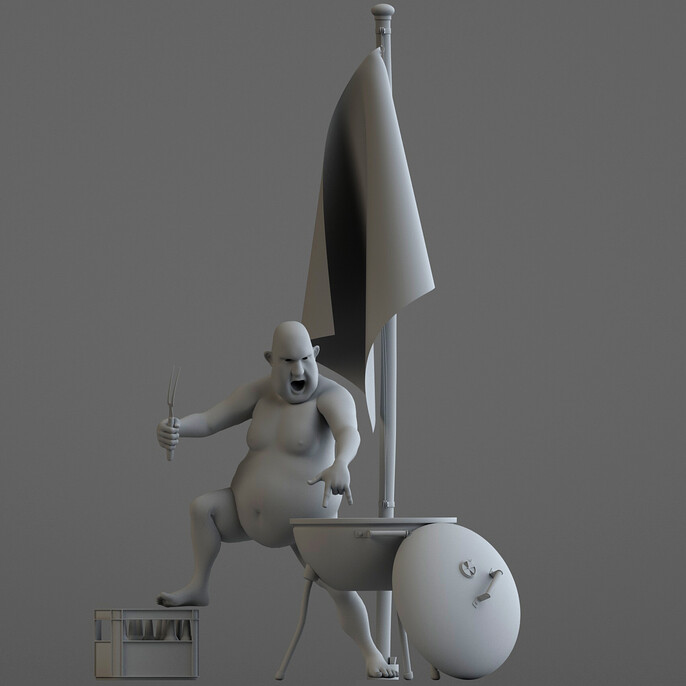
In a later stage, the flag itself was moved from the pole onto our hero, serving as the mandatory superhero cape.
Pipeline
Unfortunately, there was no such thing. A lot of trial and error was involved, and some dirty hacks had to be used to get what I wanted. Because of this, I am only talking about what worked for me in the end.
Cinema4D served as the main hub for putting everything together and for the majority of the modeling. For rendering, I used the Redshift plugin. I utilized ZBrush, Modo, Character Creator, Marvelous Designer, RizomUV, Substance Painter, EmberGen, Photoshop, 3D-Coat, and Marmoset Toolbag as well.
Creating the Character
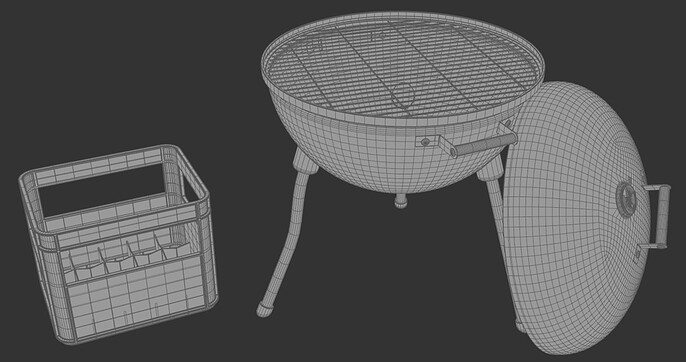
All the props and pieces were created one by one when needed and able to contribute to the overall look, during the whole process. I planned to work with clean, mostly quad-based geometry with decent resolution right from the beginning. Avoiding crappy meshes as much as possible was mandatory.
First off, I modeled the pieces necessary to pose my character accordingly: the beer crate and the kettle grill. Creating meshes in real-world units and placing them right above the ground made everything a lot easier. Of course, I looked up some reference images on the internet.
For the hero, I started with a base male figure in Character Creator 3. Using the GoZ bridge, I transferred the mesh to ZBrush and shaped it using a higher subdivision level and symmetry, without altering the topology.
Utilizing this workflow gave me the opportunity to go back and forth between the two applications without breaking the rig inside Character Creator.
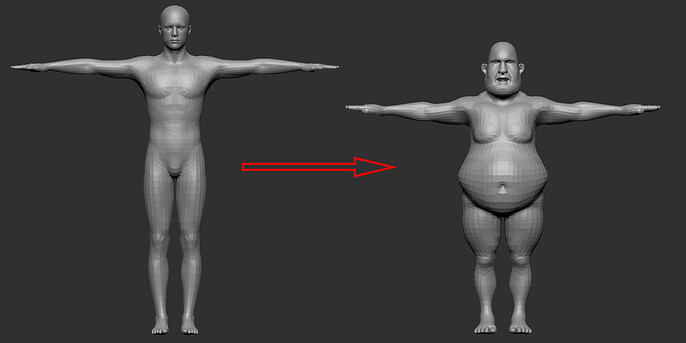
Back in Character Creator, I imported the beforehand created props and posed my character. Like most of the time, I used the OBJ format to then carry the character mesh over to Cinema4D in two versions: posed and unposed (T-pose) with the same point order. I expected this to be helpful for creating the clothing in a later step.
The props were imported to the C4D scene as well, and I modeled the flag pole, the meat fork, and a 0.5L beer bottle using reference images and some imagination. The flag itself was done with a quick xParticles cloth simulation – for the time being. After putting everything roughly in place and cloning the bottle several times, I rendered out my first image, shown in the Concept section above.
For the posed character, the mesh came out pretty crappy in some areas: the edge of the jaw, the neck, the chin, the lips, the upper right leg, and the belly–because of the extreme deformation. Nevertheless, it seemed to be sufficient for the next step: creating and simulating a t-shirt, pants, and belly belt in Marvelous Designer.
I started off by cleaning up the penetrating mesh parts of the body using the Grab Brush and NormalMove with Softselection inside Cinema4D, set up a 30 frames morph animation from T-pose to pose, and placed this into a Subdivision Surface object. This was then exported as an Alembic file to serve as an animated avatar inside Marvelous Designer.
Here, the sewing patterns for the three parts of clothing were created and simulated in a pretty high resolution. The end result was brought back to C4D as thin mesh (no thickness at all), including a normalized UV map. In C4D I prepared the mesh for further editing with ZBrush by assigning polygroups utilizing the UV map for selection.
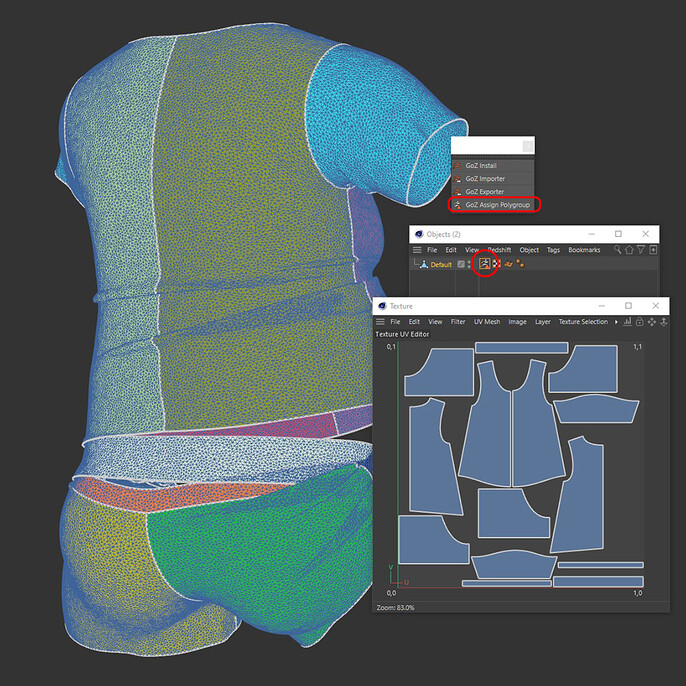
After Zremeshing in ZBrush with Keep Groups on, I had one quad-based mesh with clean edges around every polygroup for all parts of the clothing. This was then cleaned up in C4D even further by establishing parallel edge loops and some thickness on the open edges, as well as tiny indentations along the seams. There was no need for modeling a belt buckle since the belly covered everything else in this area.
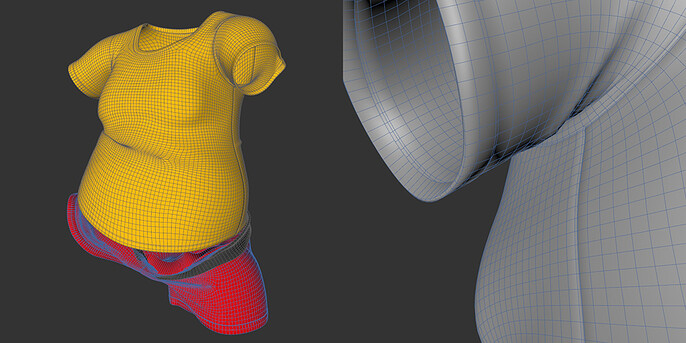
Now it was time to clean up and retopologize the ugly parts of the body mesh. This was done in Modo, because this tool gave the opportunity to keep the UVs intact while changing the topology. Even the textures which came over from Character Creator were not suitable for my hero, they could on the other hand be a nice hint of which colors to pick in which areas when painting the maps later on.
Back in C4D, body, and clothing were put together and manipulated to fit tightly. For further detailing I modeled a sandal referencing the left foot, UVed it right away and copied it over to the other foot. The mask was done by extracting parts of the face geometry and extruding it. For the rubber bands, I used sweep objects and extrusions on the connections to the mask.
For the ammunition bottles on the belt, using assemblies came in pretty handy. This way I had to model and UV map these pieces only once and reuse them two more times. By placing the pivot points at the right positions, I was able to create variations by just rotating some parts randomly.
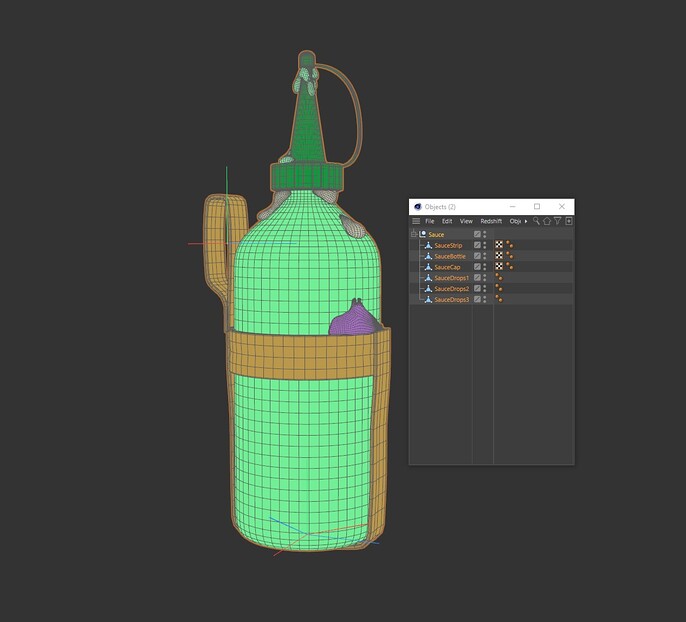
After putting the three assemblies in place, only the loop part of the straps had to be tweaked to conform the belt. A similar method was used on the chest belt. The belt itself was modeled and conformed to the body first, and then assemblies with one Tabasco bottle and a basic geometry for a part of the rubber strap were cloned on top of it. These strap parts were then bridged together and thickened.
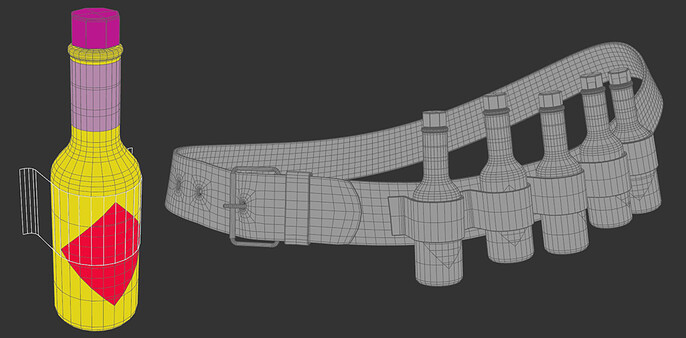
Now it was time to create the UV layouts for all the remaining parts. For low to medium subdivided pieces, I used C4Ds internal UV tools, for the more complex ones RizomUV was required.
At this point, I noticed that the character still was not looking as heroic as intended. He needed a superhero cape for sure, and I decided to let the flag fulfill this task.
For setting up a cloth sim in Marvelous Designer, a simplified dummy geometry of the character was created first using the C4D Volume Tools. All the clothing created so far was taken into account. Inside MD the sewing pattern of the flag was set up using 4 rectangular pieces that were stitched together. Getting the drapery right took quite some time. I experimented with different styles, wind directions, and intensities. Because involving wind tended to let the cape look too heroic, I ended up letting it hang down somewhat pitiful.
With the simulation done, the mesh was exported in lower precision and with Remesh on. This gave me equable quads.
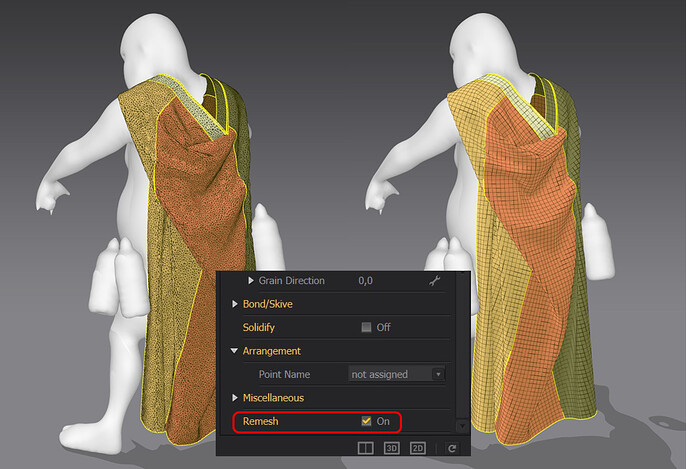
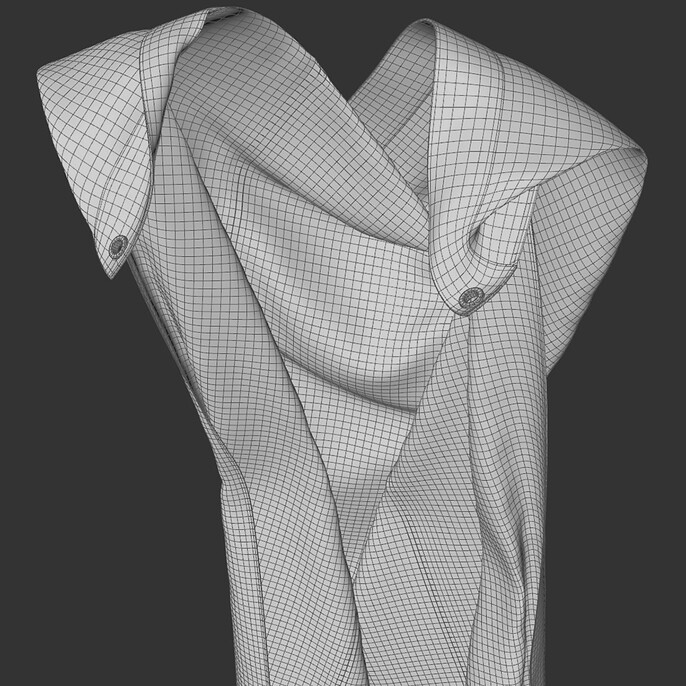
Back in C4D again, I used a Displacement Deformer with a painted vertex map falloff to get the layers of cloth apart where needed and tweaked the cape to not penetrate the existing cloth and the body using the Grab Brush. Because of the easier UV handling I then used Modo to create the necessary edging and thickness.
In C4D I utilized weight maps to control the separation between the individual parts after putting everything into a Subdivision Object. A subdivision of 3 was needed to avoid jagged edges on slanted folds.
The meat lump was modeled, UVed, and textured in an unbent state. I used reference images from the internet and projected parts of them onto the geometry. This was then painted over by hand.
Now I started developing the overall color scheme by applying plane colored materials to the individual parts.
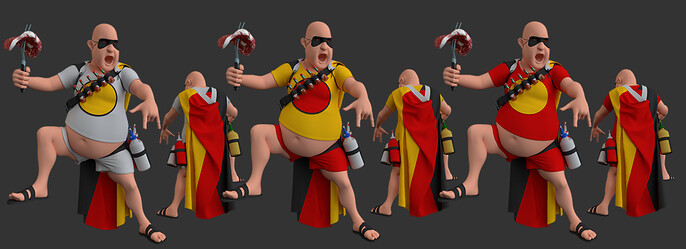
Most of the actual texturing was done in Substance Painter. For convenience, I used Substance Painter Live Link from Xolotl Studio. This way I was able to send meshes directly over to Painter and fully set up Redshift materials were returned to C4D. For the most parts, the texturing was done in 4K. Smaller parts were done in 2K or even 1K resolution. A superhero emblem for the t-shirt had to be developed as well.
While searching the internet for inspirations for additional details, I discovered terry sweatbands in national colors … this was love at the first sight. Those were recreated in C4D by modeling an underlying geometry and cloning 30,000 stretched low poly toruses with some randomness in scale and rotation on top of it. The underlying geometry was made invisible.
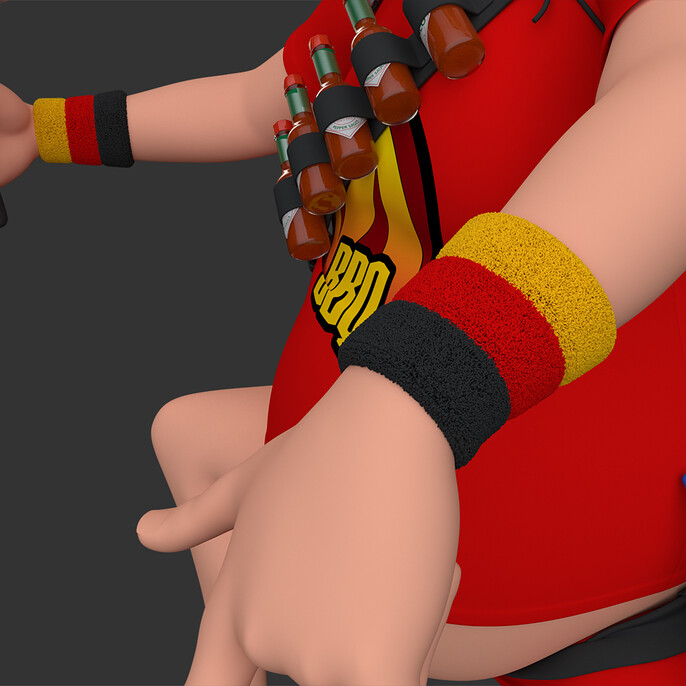
Although major folds were modeled into the cloth meshes, I used painted height information inside Painter to get additional finer folds and wrinkles through the generated normal maps.
Luckily new Stitch Brushes had been released for Painter a few days before. These came in pretty handy for all the stitching that had to be done.
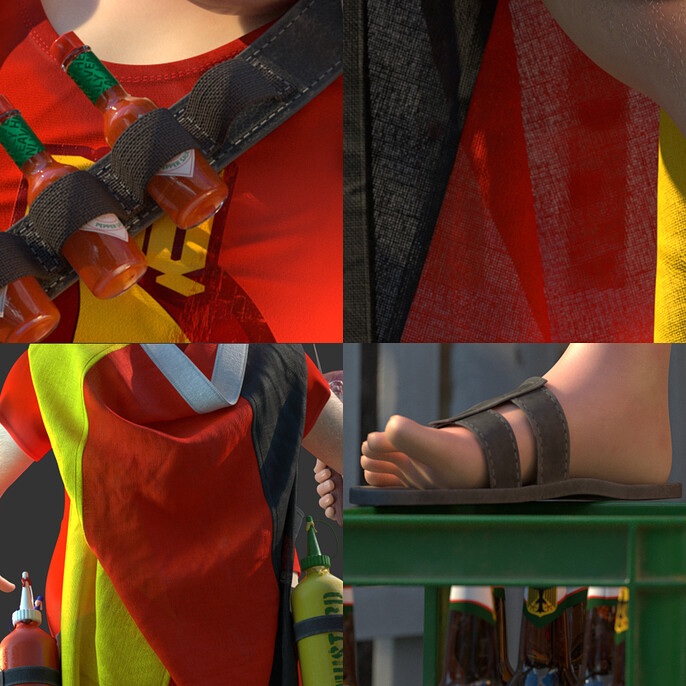
At some point, I decided to not use the UDIM approach for the body mesh. I created a new UV layout with even texel density suitable for one 8K texture in RizomUV. The so-far painted textures were baked to the new UV layout using Marmoset Toolbag. This was then sent back to Painter to get all the seams nice and smooth. Additionally, I baked out a thickness map, that served as a base for creating a scatter map to control the subsurface scattering of the skin.
I reused the geometry for the eyeballs, the teeth, and the tongue that came with the imported character from Character Creator and modified it to my liking utilizing the C4D toolset. Again I created new textures in Substance Painter.
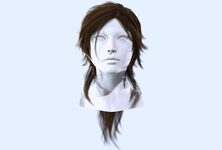
The hair was done using five separate hair systems: head, brows, arms, belly, and legs. I extracted the relevant geometry for hair growing from the body mesh and used grayscale maps to control the hair density.
Set Dressing
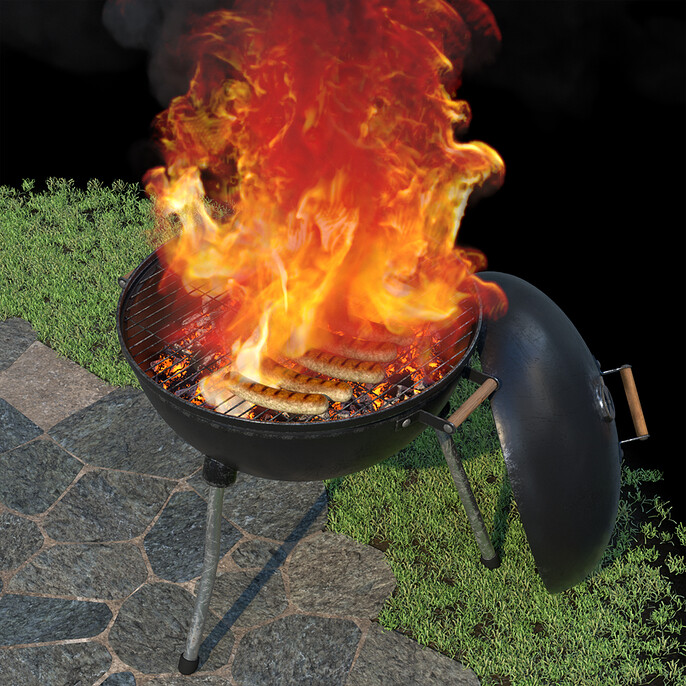
Starting off with vamping up the grill, I created the glowing charcoal now. This was done by utilizing C4D's Volume Tools in the first place. I used a Voronoi Fracture object to break up a low poly sphere into about 500 pieces and let them fall onto the ground using dynamics.
A roughly sculpted subdivided cube was added and everything went into a volume object after all. Now I used a Volume Mesher with pretty high adaptive remeshing to achieve a manageable geometry. After some Boolean operation, the charcoal geometry was done and then auto-UVed.
For texturing, only a diffuse and an emission map were needed. This was done in Substance Painter again by using noise maps and evaluating the curvature of the geometry.
Modeling the sausages was straightforward, and for texturing I utilized an ambient occlusion map baked in C4D, to get the burned marks right.
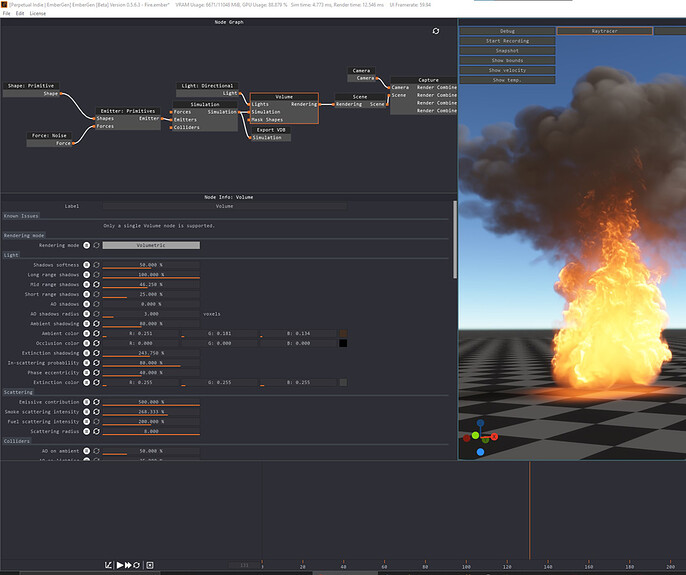
The VDB for the fire was done in EmberGen with very high resolution. EmberGen gave me real-time feedback when tweaking the parameters, as well as the option to write just one particular frame to disk. This was extremely useful for achieving fast results. Later on, the VDB channels had to be controlled by ramps inside the Redshift Volume Shader anyway.
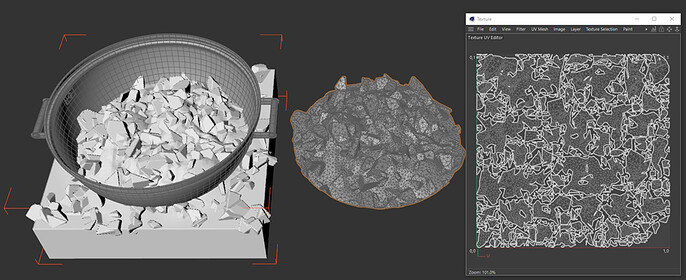
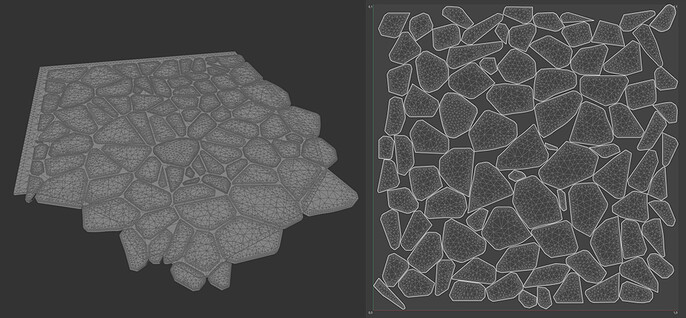
Since the flag pole and the beer crate were done already, I continued with developing the stone floor. At first, I experimented with exposed concrete slabs, which are typical for German front and backyards, but the resulting square pattern came out quite boring. I decided to go for naturally broken-up stone slabs, also pretty common in German gardens.
To get some randomness to the stone texture, I just randomized the position and rotation of the individual UV islands and blended the texture with a color ramp at a low value.
Modeling the fence was pretty simple using the C4D tools. Texturing was done in Painter once again.
For the actual ground, I created a bulged disk and flattened the top part. The soil, as well as the grass, had to fade out on the outer edge because the final camera angle was not set at this point and I wanted some liberty. All the vegetation was done with Forester inside C4D. Starting off with presets, I tweaked the parameters and materials until I liked the result.
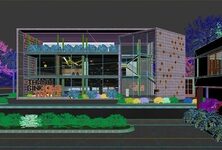
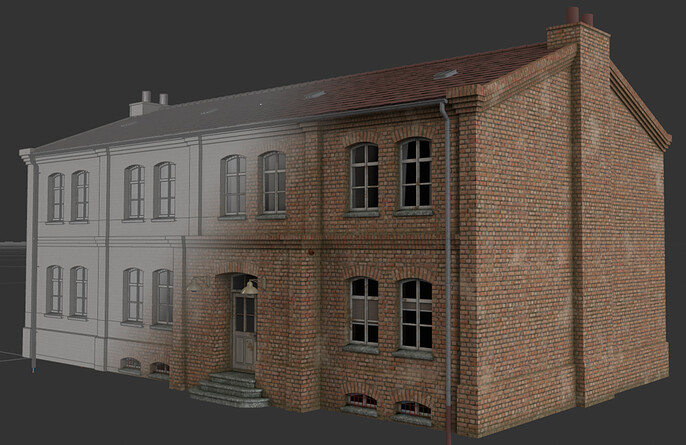
Finding the right background gave me quite a headache. I tried solid colors, photographs, painted stuff as well as HDRI skydomes–none of them was satisfactory. At some point, I decided to go full 3D and remembered a simple house facade I had created for a personal project a few years ago.
This added the missing urban flair. At this time I used 3D-Coat for texturing, because of the Spline Image Tool, which made creating the curved band of bricks above the door and the windows a snap.
Final Image
For achieving the moody sunny afternoon look I ended up using a combination of an HDRI Dome Light, several colored Area Lights, and an Infinite Light serving as the sun.
I used an 82 mm Focal Length to get a reasonably compact framing. I also had to move all the pieces around quite a bit to get some tension into the image, while respecting the rules of Golden Section and Golden Spiral as much as possible. Additionally, some shaders had to be tweaked again to find a nice color balance.
Look Def using the Redshift Realtime Preview was a pretty enjoyable task.
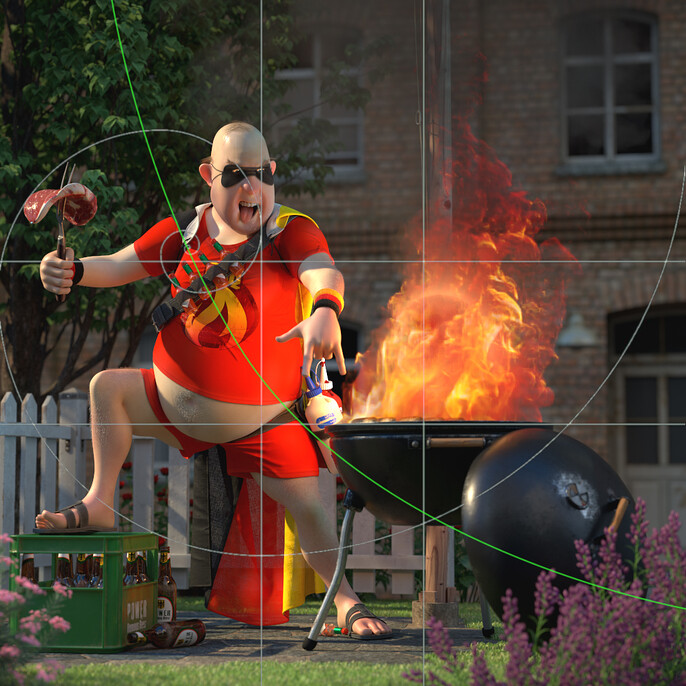
Using two RTX2080ti GPUs, rendering out the final image with slight Depth Of Field and a bit of vignetting in 4K resolution took about 16 minutes. Unfortunately, the file size of the 4K render was not accepted by the Cubebrush web interface. I had to scale down the image to 3K for submitting my entry.
Thanks for reading this far. It would be a pleasure if you could pick something useful for you out of this Making Of.
Contact Martin here.